https://www.slingfin.com/blogs/the-beta.atomSlingFin - The Beta2025-02-04T09:56:07-08:00SlingFinhttps://www.slingfin.com/blogs/the-beta/how-to-store-your-tent-to-maximize-its-lifespan2025-02-04T09:56:07-08:002025-02-04T09:56:11-08:00How to Store Your Tent to Maximize its LifespanTim Hunt
What's the best way to store your tent?
You might be surprised to learn that the reason many tents need to be retired is not how hard they’re used in the field, it’s what happens to them when they’re NOT in use. Storing your tent improperly can knock years off its life. A quality tent is a significant investment. Don’t let it fall victim to an easily preventable early death because it was stored improperly. So, how should you store your tent when you’re not using it? Fortunately, there are some easy steps you can take when storing your tent to maximize its service life.
There are three major tenets of tent storage. From most important to less important (but still pretty important), they are: DRY, DARK, and COOL. These three variables are the main factors that impact the lifespan of your tent in storage.
Places that are comfortable for you to sleep are usually good places for your tent to sleep as well.
1. DRY
Moisture is the enemy of fabric for two main reasons. First, moisture leads to hydrolysis of PU fabric coatings in your tent. If you’ve ever had a tent fly get sticky, smelly, flaky, and lose its waterproofness after a few years, you’ve seen the effects of hydrolysis. SlingFin doesn't use any PU coatings in our tents for this reason. As the prefix “hydro” implies, hydrolysis is the reaction that occurs between water and PU fabric coatings. Hydrolysis cannot occur without water, so minimizing your tent’s exposure to moisture is critical to minimizing the effects of hydrolysis. While storing your tent in 0% humidity may not be possible, the drier the air, the slower hydrolysis will occur. You can’t stop hydrolysis completely; if you have a PU-coated tent it’s been dying since the day it was born. However, minimizing moisture exposure in storage will slow its inexorable march towards the great beyond.
The second reason to store your tent in a dry place is that moisture encourages the growth of mold and mildew, both of which weaken fabric, compromise waterproofness, and make your tent look and smell gross. PU coatings exacerbate this issue, as they absorb water, creating a moisture-rich environment that’s a perfect breeding ground for nastiness.
Pro tip:You know those little silica packets that get shipped with all sorts of stuff that say "do not eat" on them? Instead of throwing them away or eating them, just chuck ‘em in with your gear! They’ll help absorb some of the ambient moisture and it’s a good way to reuse something that would otherwise end up in the trash.
Besides storing your tent in a dry place, you can mitigate the adverse effects of moisture by getting a tent with silicone and/or PE-coated fabrics. Avoid PU at all costs. Silicone and PE coatings are both hydrophobic, meaning they do not absorb water, virtually eliminating mold and mildew growth. They are also much less prone to hydrolysis than PU. PE hydrolyzes at a much slower rate than PU and silicone does not hydrolyze at all. This is another reason we do not use any PU coatings in our tents. If you want to learn more about the fabric coatings we use in our tents, check out this handy article. However, even tents with no PU coatings still use uncoated fabrics in the tent body (mesh, ripstop, etc.) that can absorb water. While hydrolysis isn’t an issue with those fabrics because they aren’t PU coated, they can still grow mold and mildew, so avoiding moisture exposure is still important even with silicone- and PE-coated tents!
An extreme example of a hydrolyzed fabric coating. Note the peeling/flaking coating and the failing seam tape. Too bad I can't take a photo of how bad it smells.
2. DARK
UV exposure is a silent killer of fabrics. We have a great article about the effects of UV on tent fabric on our blog so we won’t get into the nitty gritty here, but it’s enough to know that UV exposure is bad news for your tent. While windows do filter out some UV, there’s still plenty of UV that gets through to reach tent-killing levels over the course of long-term storage. I learned this the hard way as a kid; my family stored our gear in a loft in the garage underneath a skylight. I was shocked when I pulled a lightly-used tent down and ripped the stuff sack in half when I yanked on the drawstring. The exposure to UV through the window over a couple seasons of storage had rendered the fabric useless. Silicone-coated fabrics are less susceptible to degradation from UV than PU coated fabrics, but no fabric is immune from UV. Preventing UV damage in storage is easy- keep your gear in a dark closet or bin and it’ll be fine.
Here's a video showing what UV can do to your tent fabric if it's left out:
3. COOL
Finally, keep your tent somewhere cool. Heat speeds up hydrolysis. An example: our fabric supplier tests coating stability with the “Jungle Test”, in which they put fabric samples in a 160˚F (~70˚C) oven at 95% humidity. One week in these conditions is roughly equivalent to an entire year of normal use! PU-coated fabrics generally only handle one week in the jungle test before they start to lose their waterproofness and degrade into a sticky mess. PE coatings generally last about three times as long as PU. Silicone-coated fabrics can handle the Jungle Test indefinitely.
In addition to speeding hydrolysis, heat promotes mold and mildew growth. Living things like warm conditions- there’s a reason our body temperature is 98˚F. The combination of high humidity and warm temperatures creates a veritable Petri dish in your gear closet.
You don’t have to refrigerate your tent or anything, but if you have a choice between a sweltering outdoor shed and an indoor closet, go with the cooler of the two. Now, you might be tempted to store your tent in your basement because it’s cooler. Don’t do it! Unless you live somewhere with consistently low humidity, basements are often too humid for tent storage. The high humidity found in basements far outweighs the benefits from the cooler temperatures. Prioritize DRY and DARK before optimizing for temperature.
The windowless room where we store our inventory is always freezing regardless of the outside temperature.
Should I Stuff or Roll My Tent?
Ah, yes, the age-old question: should I stuff or roll my tent? Here’s the dirty little secret: how you pack your tent into its bag is small potatoes compared to the issues I mentioned above. Laminates like DCF and Ultra TNT can delaminate or develop pinholes if they’re creased or compressed excessively, so it’s recommended to gently roll those or stuff them into an oversized stuff sack, but standard woven tent fabrics are not as sensitive so you can stuff or roll as your heart desires. Or, if you want to store your tent uncompressed (which certainly won't hurt anything) you can put it in a pillowcase. The breathable cotton will allow any residual moisture in the tent to evaporate in storage.
Personally, I stuff my tent when I’m in the field because I want to break camp quickly and I roll it neatly for long term storage. Just be gentle if you choose to stuff. If you stuff, put your tent poles in the stuff sack FIRST, and then stuff your tent around them. Jamming your poles in after your tent can tear the tent or stuff sack. As long as you thoroughly dry your tent before you put it away, it doesn’t really matter how you pack it.
How should I store my tent poles?
To avoid wearing out the shock cord in your tent poles, fold them from the middle first and work your way out instead of starting at one end. This ensures even tension on the cord as you fold the poles. If you have room, you can store your poles assembled, but BE WARNED: if there is ANY moisture on your poles when they get put away (even high humidity) then storing your poles assembled can cause the aluminum inserts to corrode and fuse together. Only store your poles assembled if you are absolutely sure they're dry and you live in an arid place. Worn-out shock cord can be replaced easily (natural rubber degrades over time anyway, it's normal to need to replace shock cord eventually). However, once poles corrode together the affected pole sections need to be scrapped, so err on the side of storing your poles folded.
Here's a demo of proper pole-folding technique:
So, where should I store my tent?
In a perfect world, everyone would have an air-conditioned, dark closet with a dehumidifier to store their gear. Honestly, depending on how serious your gear obsession is, building a climate-controlled gear vault might actually be cost-effective when you amortize the cost of your gear across its lifespan. Unfortunately, that’s not an option for most of us. Your best option will probably look like a windowless closet in the living area of your home (i.e., not an attic, garage, or basement), away from humid areas like bathrooms and protected from extreme temperature swings. A little care when putting your tent away will pay dividends down the road in your gear’s lifespan.
]]>
https://www.slingfin.com/blogs/the-beta/single-wall-tents-vs-double-wall-tents-which-is-best-for-you2024-12-06T13:49:50-08:002024-12-06T13:49:50-08:00Single-Wall Tents vs. Double-Wall Tents: Which is Best For You?Tim HuntSingle-Wall vs. Double-Wall Tents: Which Is Best For You?
When buying a tent, one of the important decisions you need to make is whether you should get a single-wall or double-wall tent. As with every tent-related decision you (and tent designers) make, everything has tradeoffs. Ultimately, the “right” choice depends on your personal priorities and use case, and it won’t be the same for everybody. “Tent your own tent”, you could say. In this article, I’ll break down the differences between single-wall and double-wall tents so you can make an informed decision about which is appropriate for you.
What is a single-wall tent?
A single-wall tent has only one layer of fabric between you and the elements. The fabric used in single-wall tents is almost always waterproof and is usually either a coated woven fabric like silnylon or silpoly, or a laminate like DCF or UltraTNT. Some single wall tents (usually alpine-focused tents) use a so-called “waterproof breathable” fabric that allows some water to evaporate through the fabric while keeping rain out. In practice, these fabrics often end up being neither particularly waterproof nor very breathable when used in a tent.
Single-wall tents are commonly used for ultralight backpacking or in niche mountaineering applications, like tents designed specifically for an ultralight summit push. Ultralight (UL) single-wall backpacking tents are primarily trekking pole-supported tents whose primary goal is providing adequate shelter at the lowest possible weight. Many popular UL tents have a single layer of fabric going over the top of the tent, but mesh sidewalls with waterproof vestibules. However, since the main canopy of the tent is only one layer of fabric, these shelters are still considered single-wall tents. The main reason to choose a single-wall tent is weight savings.
What is a double-wall tent?
If you ask someone to “think about a tent”, chances are they’ll picture a double-wall tent. As the name implies, a double-wall tent has three layers of fabric between you and the elements. Just kidding. It’s two layers. Gotta keep you on your toes. These two layers consist of a tent body (some folks call this an inner tent) made of breathable fabric and a waterproof fly (also called a flysheet, rainfly, or outer tent). Tent bodies have waterproof floors and the walls are typically either made of mesh (in the case of three-season tents), a breathable ripstop fabric (in the case of four-season tents), or a combination of both. In some tents, the tent body and fly are connected, permanently or semi-permanently. These are still double-wall tents because they have a separate tent body and fly.
Double-wall tents are much more common than single-wall tents, and most tents with tent poles fall into this category. The main reason to choose a double-wall tent over a single-wall tent is superiorperformance in varied conditions.
What are the advantages of single-wall tents?
Now that we’re clear on the difference, let’s dive into the strengths and weaknesses of each. We'll start with single-wall tents.
1. Weight savings: This is the main advantage of single-wall tents. By eliminating the tent body and making a tent that’s basically only a fly, you’re using less fabric. Less fabric means less weight. Simple as that.
2. Simplicity: When setting up a single-wall tent, there’s no need to set up the tent body first and then attach the flysheet. The tent is consolidated into a single unit and it sets up in one piece. This makes it easy to keep the interior of the tent dry when setting up your tent in the rain. However, the single-wall tents favored by thru-hikers are often non-freestanding trekking pole tents with more complex setup than simple freestanding double-wall tents, so this is often a wash. But generally, setting up single wall tents is simpler because there's no separate fly and tent body to deal with. The tradeoff for this (remember, everything’s a tradeoff) is if the outside of your single-wall tent is wet when you pack it away, you can’t separate it from the rest of your tent and the inside of your tent will likely get wet in your pack. However, there are some double-wall tents that pitch with the poles on the outside, allowing the inner to be pitched at the same time as the flysheet, so you have options here.
What are the advantages of double-wall tents?
1. Condensation management: This is the main reason most people opt for double-wall tents and why they are generally a better choice for users who are willing to carry more than the bare minimum amount of weight. While “condensation management” may sound esoteric and nerdy, it’s actually very relevant and probably a bigger deal than you think it is.
To understand why condensation management is important, we must first understand what condensation is and why it forms. Be warned- physics ahead! Condensation happens when water vapor in the air (aka humidity) hits a cold surface and changes phase from gas to liquid. Cold air can’t hold as much water vapor as warm air, so when it hits a cold surface, the water vapor in the air builds up on the surface as liquid water. Think of a glass of ice water sitting out on a muggy summer day. Warm, humid air hits the cold surface of glass and forms water droplets. No, the glass isn’t leaking. And neither is your tent, by the way, despite what you may have yelled at that hapless customer service rep.
So how is this relevant to tents? Well, you have warm, moist air inside the tent because you are both warm and moist (yes, I called you moist, get over it) and constantly releasing water vapor into the air- it’s in your breath and evaporating off your skin. This means there’s lots of water vapor in the air inside the tent. When it hits a cold, waterproof surface (e.g., your tent’s fly) the vapor condenses into water droplets, creating a layer of water on the inside of the fabric. In a double-wall tent, water vapor can pass through the breathable inner tent fabric because it’s not waterproof, so it condenses on the fly where you won’t accidentally brush up against it. The tent body acts as a barrier between you and the wet fly. If you’re in a single-wall tent, there’s nothing between you and the fly so condensation forms on the interior of the tent where you’re likely to come into contact with it.
On a single overnight trip where you’re packing up in the morning and going back to your warm car, it doesn’t matter if you wake up damp. However, on long trips in damp or cold conditions when you may not be able to fully dry your insulation during the day, moisture can become a serious safety hazard because it progressively degrades your insulation’s effectiveness over the course of the trip. This is why we designed our HotBox as a double-wall tent. Every other tent in that category is a single-wall tent, but since these are compact tents designed to hold two people in extremely cold alpine conditions, you can hopefully now understand why single-wall tents used for this application are condensation factories. Some of these tents try to reduce condensation by using more breathable but non-waterproof fabric, which is also problematic because sometimes it rains in the mountains, or so I’ve heard. By building a tent with the same pole structure but making it double-wall instead of single-wall, we made a tent that’s less prone to condensation and more reliably waterproof than other tents in its category.
Double-wall tents are not a silver bullet against condensation, but they will almost always form less condensation inside the tent body than single-wall tents.
2. Versatility:
The superior condensation management of double-wall tents means they’re better suited for a wider range of conditions than single-wall tents. In addition to the environmental conditions they can handle, double-wall tents also have more modularity than single-wall tents in that you can choose whether or not to use the fly based on the conditions. If the weather is stable, you can pitch the tent without the fly for tons of ventilation and a more seamless experience with the world around you while still maintaining bug protection. With a single-wall tent, you’re stuck with the same configuration regardless of the conditions. However, some double-wall tents pitch with the tent body and fly pre-connected, and in doing so sacrifice the ability to easily set up the tent body without the fly in favor of keeping the tent body dry when you’re setting up the tent in the rain. Remember what I said about tradeoffs? If you don’t spend much time in your tent or you never set up your tent without the flysheet then the ability to stargaze or enjoy the scenery from inside your tent may not be a big deal to you. But if you like leisurely camp evenings in your tent, then you may appreciate the ability to set your tent up in different configurations. When you camp in rainy weather, having a separate fly is nice because you can pack it separately when it’s wet, keeping the rest of your tent dry.
Double-wall tents also perform better in a wider range of temperature conditions. As I mentioned before, condensation is worse when it’s cold out, making double-wall tents more functional in cold conditions. However, double-wall tents tend to be more comfortable when it’s hot too. When you’re not using the fly, the reason for this is obvious. But even with the fly on, fresh air can circulate between the tent body and fly, replacing the warmer air inside the tent with cooler air from outside. Single-wall tents generally have less air circulation which can cause them to get stuffy.
Which style of tent is best for me?
As with every gear acquisition, the first step when making a buying decision is to define your use case, and then select the equipment that best meets your specific needs. The main reason to choose a single-wall tent over a double-wall tent is saving weight. A single-wall tent might be right for you if your top priority is minimizing your pack weight as much as possible, and every other priority pales in comparison. The tradeoff is that you WILL experience significant condensation in a single-wall tent, so you have to be okay with damp mornings and the occasional hot, stuffy night. Generally speaking, if you’re on a thru-hike and doing 20-30 miles a day for a few months, you’re probably willing to put up with some more discomfort for the sake of saving weight (even though I know you're lying when you say you sleep well on that 1/8" CCF pad). Outside of thru-hiking and UL backpacking, it’s more likely that the weight savings of a single-wall tent doesn’t outweigh the performance gains of a double-wall tent.
A single-wall might be best for you if:
1. Minimizing your pack weight is more important to you than nighttime comfort.
2. You primarily camp in mild weather.
3. You do most of your camping in arid environments like the southwestern US.
4. You hike most of the day and spend the minimum amount of time possible in camp and in your tent.
5. You go on short trips where you can bail if you get wet.
You will probably prefer a double-wall tent if:
1. You plan to camp in a wide range of environments.
2. You regularly camp in variable weather, high humidity, or cold conditions.
3. You go on remote trips with long stretches between resupplies where drying out your gear in the field might not be an option.
4. You like to savor your time in camp instead of hiking all day.
5. You’re new to backpacking and want a tent for all-around use.
Our Recommendation
In a nutshell, single-wall tents are better for saving as much weight as possible at the cost of performance in inclement and humid conditions. Double-wall tents are better for all-around use in variable and cold weather.
Chances are, if you’re not absolutely sure a single-wall tent is the best choice for you (in which case why are you reading this?), it probably isn’t. At SlingFin, we believe that double-wall tents are usually a better choice for most people, which is why that’s primarily what we make. Single-wall tents are best as part of a multi-shelter quiver to be used when conditions are appropriate. They are ideal for experienced campers with the skills to minimize condensation through proper campsite selection and deal with the condensation they will inevitably experience. If you’re buying your first tent, chances are a double-wall is the way to go. If you’re adding a second, third, or (god bless you) a fourth tent to your collection, a single-wall tent probably deserves a spot in your rotation. If you’re diving straight into the deep end of ultralight backpacking and you know you want a single-wall tent, then go for it. More power to you- just be aware that you will experience condensation and prepare accordingly.
When we make single-wall tents like the SplitWing or the Cinder Cone, we offer modular accessories so you can use your tent as a double-wall tent when conditions demand it. For instance, the SplitWing can be just as easily set up with or without the mesh body, so if you expect bugs and/or condensation to be an issue, you can bring the mesh body and run your shelter as a double-wall. If you’re on a late summer trip in the Sierra where the only weather you have to worry about is an occasional thunderstorm, you can leave the mesh body at home and enjoy the weight savings of a single-wall tent. Our only true single-wall tents are the LFD and BFD, which are niche tents for high-altitude basecamps where precipitation falls as snow, and UV resistance is the primary concern. Both the LFD and BFD are large enough that users are unlikely to contact the walls of the tent where the condensation collects.
Conclusion & Some Words of Caution
For better or worse, we live in a world with nuance and a wealth of individual experience. People (and brands) may express strong opinions one way or the other. Don’t trust anyone who promises you a condensation-free single-wall tent. They’re lying to you and probably don’t camp much. Also be wary of double-wall tents that are light enough to rival the weight of single-wall tents. There’s no magic in tent design (remember those pesky tradeoffs!) and those tents make significant sacrifices to durability, size, features, and/or strength to achieve those low weights. Those sacrifices may very well be worth it to you, but at least figure out what you’re giving up before you get lured in by the specs.
Our best advice to help you choose which tent is right for you is to approach it holistically. First, define your use case. Then do your research and make an informed decision that takes into account not only what you gain, but also what you give up.
]]>
https://www.slingfin.com/blogs/the-beta/tims-2024-tour-divide-bike-check-and-gear-breakdown2024-08-13T18:59:45-07:002024-08-13T18:59:46-07:00Tim's 2024 Tour Divide Bike Check and Gear BreakdownTim Hunt
In this video Tim does a deep dive into the bike and gear he used on the 2024 Tour Divide. The 2700-mile Tour Divide is a self-supported bikepacking race that follows the Continental Divide from Banff, Alberta, to the US-Mexico border in Antelope Wells, New Mexico.
A good Tour Divide setup needs to keep a rider (and bicycle) alive in a huge range of weather conditions from snow to scorching desert heat, but must be light enough to cover 100+ miles per day for several weeks through mountainous and remote terrain without outside support. Keep watching to learn about the bike setup and unconventional shelter choice that helped Tim survive the Divide.
]]>
https://www.slingfin.com/blogs/the-beta/how-to-repair-your-tents-fly-and-floor2024-06-13T14:31:56-07:002024-09-23T14:01:19-07:00How To Repair Your Tent's Fly and FloorTim Hunt
In this video, we walk you through two basic repair techniques for your tent's fly or floor fabric. The first technique works on small holes, like pinholes and holes smaller than 1/8". The second technique works on larger tears. It's a great way to keep your tent going, year after year!
]]>
https://www.slingfin.com/blogs/the-beta/uv-and-u-tent-fabrics-and-sun-damage2022-11-10T13:49:10-08:002022-11-10T15:20:55-08:00UV and You: Tent Fabrics and Sun DamageTim HuntMore]]>
Tents have it pretty rough. Their purpose is to keep you protected from the elements, so by definition, they’re exposed to nature’s fury so you don’t have to be. Season after season, your trusty tent is subjected to wind, rain, dust, snow, hail, animals, and (sometimes) careless users. But for a tent that has been treated well over the years, the thing that will eventually kill it is something you might not expect: the sun.
In this article we'll go through some fabric basics and the reasoning behind our experimental design before we dive into the results. We discuss which fabrics outperformed expectations and which fabrics fell short. This includes a discussion of polyester vs. nylon and the performance of different fabric coatings. Finally, we'll talk about what this means for the user in practical terms, and how to mitigate the harmful effects of UV on your tent to maximize your tent's lifespan.
LFD on Everest. Overexposed for dramatic effect.
In addition to visible light, the sun emits a massive amount of ultraviolet (UV) radiation, which has a shorter wavelength than visible light and is present wherever there is sunlight. While inorganic materials (like silicone and metal) are largely unaffected by UV radiation, organic compounds (i.e., anything containing carbon, not just your fancy kale) can be damaged by exposure to UV. This includes all organic polymers, whether synthetic (like nylon and polyester) or naturally occurring (like cotton and wool).
MATERIALS BACKGROUND
Synthetic polymers (e.g., all plastics) are ubiquitous in the tent world. By the time modern geodesic tents hit the scene in the 1970s with the North Face Oval Intention, pretty much all technical lightweight tents have been made of synthetic polymers, usually nylon or polyester. Historically, nylon has been far more popular, with polyester relegated to the realm of low-end price point tents. Recently, however, a new crop of high-end shelters has emerged using higher quality polyester, which has become popular for its ability to retain its shape when wet and its reputation for superior UV resistance. For some background on tent fabrics, check out our tent fabric article here.
Terminology
Here's a quick terminology explainer to make sense of the abbreviation soup in our fabric names. For example, let's look at our Portal/2Lite/SplitWing/Flat Tarp fly fabric: 10D*450T NY66 RS SIL/SIL.
10D- "D" refers to the denier (pronounced DEN-yer) of the fabric, which is basically the weight of the individual fibers that make up the fabric. Technically, 10D means that a 9000 meter length of one of the individual yarns weighs 10 grams. But for the purposes of this article, it's enough to know that a small denier means a lightweight fabric and a larger denier is a heavier fabric. Larger denier fabrics tend to perform better in UV because not as much UV penetrates the yarns.
450T- "T" is the thread count of the fabric, or the number of fibers in one square inch of the fabric. We didn't isolate this as a variable so it's not particularly relevant in this article.
NY66- "NY" means nylon. "66" means it's type 66 nylon. Type 66 is much less common than type 6 so if it's not specified NY66 then it's assumed to be type 6. If the fabric is polyester, it will say "Poly" here instead of "NY".
RS- Denotes a ripstop fabric. Ripstop fabrics have a grid of larger denier fabrics woven into the fabric to stop tears from propagating through the fabric. That's the square grid you can see in many technical lightweight fabrics. Almost all tent fabrics are ripstops. The alternative to ripstop is taffeta, denoted by "Tf". We only included one taffeta in this test.
SIL/SIL- This describes the fabric coating. Sil/sil means the fabric is coated on both sides with silicone. This is unlike sil/PE or sil/PU fabrics, which are coated on one side with silicone and with polyether urethane (PE, also called PeU) or polyester urethane (PU) on the other. "TiO2" means the fabric coating contains titanium dioxide. More on that later. For a more detailed explanation of the pros and cons of each coating, check out our fabric coatings article.
Synthetic Polymer Chemistry
Now, let’s hold our noses real quick for a bit of chemistry. It’ll be over soon, I promise. Polymers are large molecules (called macromolecules) composed of chains of smaller components called monomers. These monomers are linked together in chains held together with different types of chemical bonds. In nylon, these are called amide bonds, which is why nylon is also known as polyamide. Polyester is similar in that it is made of monomers linked by ester bonds. Poly-amide, poly-ester… get it? I really thought I would never have to think about this again after I ditched pre-med, but I just can’t seem to escape organic chemistry entirely.
UV radiation breaks down the bonds between these monomers, leading to the disruption of the macromolecules. In practice, this means nylon and polyester fabrics become brittle, weak, and unsuitable for use in tents. Fabric left exposed to sunlight for too long starts to look, feel, and tear like tissue paper.
STUDY GOALS
While it has been generally accepted by the outdoor industry that polyester has better UV resistance than nylon, the experimental evidence supporting this comes predominantly from other industries and generally involves much heavier fabrics in a variety of bizarre testing conditions. We haven’t been able to find any studies directly examining the effects of sun exposure on the lightweight fabrics used in outdoor equipment. So in the interest of making informed design decisions, we decided to conduct our own dubiously scientific tests to investigate the effect of UV on tent fabrics. We wanted to know just how big of a role UV plays in a fabric’s lifespan, and what other factors contribute to a fabric’s UV resistance, like weight, coating, and fabric type.
From our experience making tents, we know that UV is the only thing that will inevitably kill a properly cared-for tent (as long as you didn’t buy a tent with PU-coated fabrics), but we wanted to know just how quickly that destruction takes place. Is UV really all that much of a factor in tent lifespan? How much do you have to use a tent for it to get UV-cooked? Is polyester really better than nylon, and if so, by how much?
EXPERIMENTAL DESIGN AND DATA COLLECTION
The primary goal with our experimental design was to find a way to compare fabrics side-by-side in the same conditions, and to reveal broad trends in how fabrics react to UV exposure. These tests are not to any standard, ASTM or otherwise, so we caution against extrapolating these results too broadly. The purpose of this experiment was to compare a variety of fabrics to each other, some field-proven and some new, to inform our fabric selection and design process.
Test apparatus and procedure
To begin, we had to design our testing facility. We wanted our testing to simulate real-world conditions as closely as possible. And since we don’t have access to an ASTM-compliant UV testing facility but we do have a nice roof above our design studio, we decided to put the fabrics outside and let the sun do its thing, since that’s a better simulation of real world tent use anyway. We assembled some industrial racking, oriented southwest for maximum daily sun exposure. We sewed together panels of up to six fabric swatches, all side-by-side and facing the same angle.
UV testing with 18 fabric swatches
To measure the damage to the fabrics, we selected tensile strength as a benchmark because it’s reproducible, accurate, and easily quantifiable.
Our tensile tester: Destroyer of fabrics, giver of data
After each test period, we cut a 12” x 2” strip from each fabric and cut it into two 6” x 2” pieces. We then pulled the pieces apart in our lab and averaged the results to make our data point. Every few weeks, we cut another strip and tracked the fabric’s descent towards its inevitable demise.
Our UV testing setup after the first test strips were removed. From left to right: 20D nylon sil/PE, 20D nylon sil/sil, 40D nylon 66 sil/sil, 70D nylon sil/sil, 300D polyester PE, 10D nylon 66 sil/sil
Prepping samples of the fabrics pictured above
Pulling apart our 40D*260T NY66 RS SIL/SIL
RESULTS
The first thing we noticed when we started tearing fabric apart is that UV damage occurs rapidly to tent fabrics of all weights. After one month of exposure, all the fabrics except one exhibited a measurable drop in tensile strength, with losses ranging from about 5% to a whopping 47%. After 100 days, all the fabrics (besides our three titanium dioxide-coated fabrics, which we’ll discuss later) had dropped below 70% of their original tensile strength, and most of the fabrics lighter than 40D (as well as some of the heavier fabrics) had lost over 50% of their strength. The weathering was visually obvious as well. The colors faded, the whites turned yellow, and there was general discoloration.
Before and after:
Day 0: So fresh, so clean
Day 98: Not so much. Note that the white TiO2-coated fabric in the upper left is relatively unchanged.
INTERPRETING THE DATA
It’s important to note that obviously, not all fabrics start out with the same tensile strength. A 50% reduction in strength may not be a big deal or it may render a fabric totally useless, depending on how strong it was to begin with. To help visualize this, we made two graphs of the same data: one is each fabric’s tensile strength in pounds, and the other is each fabric’s tensile strength as a percentage of its original strength. When we talk about the rate of strength loss, we’re usually referring to the rate at which it loses strength compared to where it started. We think the rate of strength loss is more indicative of how well a fabric stands up to UV exposure.
UV resistance and tensile strength
When we say that a fabric is UV-resistant, we mean that the rate of strength loss is slow compared to its initial strength. For example, after 208 days of UV exposure, a 300D polyester was tearing at around 64lbs. Our 10D nylon was tearing at around 32lbs. However, the 10D started at 72lbs (that’s exceptional for a 10D, by the way), or about a 65% loss compared to its original tensile strength, whereas the 300D started at a whopping 334lbs, meaning it had lost 81% of its strength by the end of the test. Thus, we say the 10D is much more UV-resistant than the 300D because it was closer to its initial strength, even though the 300D was still technically twice as strong by the end of the test.
Of course, we still factor tensile strength into our fabric selection process. One way to increase a tent’s lifespan is to use a fabric that’s initially much stronger than it needs to be, so it will take longer to reach the point where the UV degradation becomes a functional issue. But at a certain point, very UV-resistant fabrics will eclipse less UV-resistant fabrics that started out stronger. For instance, after about 150 days, the 10D nylon that I mentioned above actually surpassed the strength of all three of the 20D fabrics that we tested, as well as a 40D nylon that started out 76% stronger than the 10D. So while the 10D started out with a lower tensile strength, its UV resistance was so much better than the other fabrics that eventually the 10D was the strongest of the five.
Without further ado, here are the results:
WINNERS AND LOSERS
There were a few fabrics that stood out for both good and bad reasons. Several fabrics performed surprisingly well; far better than their weight would suggest, whereas others significantly underperformed expectations. We’ll start with the overachievers.
Overachievers
The biggest surprise of our testing was our 10D*450T NY66 SIL/SIL, which is the flysheet fabric we use in our Portal, 2Lite, SplitWing Tarp, and Flat Tarp. Generally, such lightweight fabrics have relatively poor UV resistance because the sun penetrates them more easily. However, our 10D nylon was exceptionally UV-resistant. It could be because it's a type 66 nylon, but the 40D NY66 that we tested did significantly worse, so it's hard to say exactly why our 10D did so well. In terms of the rate of strength loss, it outperformed all the non-titanium dioxide coated fabrics. In terms of absolute tensile strength, by the end of our test period, it was actually stronger than several of the fabrics that started out with a higher tensile strength by virtue of its slow rate of strength loss.
The other top performers were titanium dioxide (TiO2) coated fabrics, which was not surprising as the UV mitigating qualities of TiO2 are well-established. Titanium Dioxide is a UV blocker commonly used in sunscreens and paints. This stuff is great, and has absolutely unbelievable UV resistance. It can be mixed in with some coatings specifically to increase their UV resistance, which is what we do with our LFD and BFD expedition basecamp domes. The Everest season is 2-3 months, during which the tents are left up continuously between 15k and 20k feet in elevation where the UV index is about 20% higher because of the thinner atmosphere. These are absolutely brutal conditions for fabric. Guides using our domes on Everest report getting 5-8 seasons of use out of our LFD/BFD. Other companies’ non-TiO2 coated domes generally last 1-2 seasons, according to those guides.
The best performing fabric was our ET70 fabric, which is a TiO2-coated 70D nylon. Unfortunately, we’ve had to move on from it because of supplier QC issues. However, we’ve found a great alternative in a 250D TiO2-coated polyester ripstop, which is much stronger by virtue of its being heavier. So while the UV resistance of the TiO2-coated polyester is slightly lower (although we’re working with our new supplier to add more TiO2 to the coating to get it up to the level of ET70, because overkill is underrated), its strength started out so much higher that at the current rate of strength loss, it would take about 460 days of exposure to reach the initial tensile strength of the ET70. That’s four seasons on Everest, even when adjusting for the higher UV index at altitude. Not too shabby. But I digress. Long story short, TiO2 makes a BIG difference. To visualize the effect of the TiO2 coating, compare the graph of the 250D Poly RS TiO2 with the 250D Poly RS without TiO2, which is the exact same fabric without a TiO2 coating. Notice a difference? Thought so.
Slackers
It wasn’t all fun in the sun, though. There were a few fabrics that on paper should have performed very well but failed to meet expectations. The most egregious was the 300D solution-dyed polyester. 300D is quite heavy by tent standards (which usually translates to better UV resistance), and because solution-dyed fabrics tend to do better in UV*, we were expecting it to be a top performer, especially given polyester’s reputation for UV resistance. It lost a whopping 38% of its tensile strength in the first month of testing. The only fabrics that lost more strength in that time were two lightweight 20D fabrics; a PE-coated nylon and a sil/PE-coated polyester. After 132 days, the 300D poly had lost almost 75% of its initial strength. By contrast, in that same time period, our 10D NY66 only lost about 37% of its initial strength.
*solution-dyed fabrics are dyed early in the production process, before the raw material is spun into yarns. The pigment fully permeates the yarns, making them less penetrable to UV. For the same reason, darker fabrics tend to be more UV-resistant because they're less penetrable to light.
The other biggest flop was the 20D*420T Poly RS sil/PE, which is a popular fabric in some “silpoly” shelters (even though it’s not sil/sil, more on that in our fabric coatings article). It lost almost half its strength in the first month, and after 104 days was down to only 14% of its original tensile strength. It was so bad by this point that we could barely get it into our tear tester intact, and it was easy to pierce with a finger. We call this “the finger test” and when a fabric fails the finger test, it’s totally cooked. It performed comparably to a 20D sil/PE nylon, which I expected to be the least UV-resistant fabric of the test. I didn’t have many good reasons to believe the 20D polyester would do better than the 20D nylon other than what I’ve read in other folks’ marketing materials, but I guess I’m a sucker, and the 20D polyester’s poor performance was therefore more noteworthy to me.
20D polyester sil/PE finger test
20D*420T Poly RS sil/PE at the end of the testing period. Total devastation. Where did the rest of it go? The answer is blowin' in the wind.
POLYESTER VS. NYLON
My expectations for the polyesters were higher than for our nylons because of polyester’s widespread reputation for excellent UV resistance. But if you’ve been paying attention, you may have noticed that two of the three least UV-resistant fabrics were polyester. That may sound like a glaring indictment of all polyester, but there are some important caveats.
Let’s compare our two worst-performing fabrics, in terms of relative strength loss. One was the 20D*420T Poly RS sil/PE I mentioned above, and the other was the 20D*330T NY RS sil/PE floor fabric we use in our lightweight tents. Both started out at basically the same strength and have the same type of coating. Since this polyester is already in use in a variety of other flysheets and tarps, we expected it to fare significantly better than the comparable weight nylon. However, compared to the nylon, the polyester performed slightly worse. The difference wasn’t big enough to say definitively that the nylon is more UV-resistant, but I feel pretty good about saying that there’s no significant increase in UV performance by switching to polyester in this particular case. Either way, I wouldn’t feel comfortable speccing either of these fabrics in a flysheet, given their poor performance in UV. That’s one of the reasons we only use this particular nylon in our floors, tent body reinforcements, and the WebTruss of our CrossBow tent (20D provides a balance of weight and abrasion/puncture resistance and the PE coating gives the fabric excellent seam slippage, which is important for the high tension seams on the WebTruss and reinforcements).
However, we observed several instances of polyesters falling short of comparable (or even lighter) nylons. One example is the non-TiO2 coated 250D Poly RS. With a Titanium Dioxide coating, this fabric outperformed everything except our original ET70. But without the TiO2 coating, it really was nothing special. While it did better than the terrible 300D solution dyed polyester (as it should; it ain’t cheap, even without the TiO2), it was beaten by our 70D nylon sil/sil expedition series flysheet fabric (used in our Indus, ProGuide 3, Arctic 6, and Kahiltna Dome), which is about 40% lighter, and yes, also by our 10D nylon 66 sil/sil flysheet fabric (seriously, that stuff is incredible).
There are limitations to the conclusions we can draw from these results. There is a lot of variation even between fabrics of the same spec; every fabric is an individual, so apples-to-apples testing is very hard, and we’re limited to whichever fabrics we’re able to get our hands on for testing. As I’ll discuss in the next section, the type of coating seems to have an effect on UV resistance, and we didn’t have access to any sil/sil polyesters for testing. Generally, sil/sil fabrics outperformed comparable sil/PE fabrics, and all our polyesters were sil/PE, PU, or PE only. So at this point, I wouldn’t go so far as to assert that nylon is more UV-resistant than polyester as a rule, but what is clear that polyester is not necessarily more UV-resistant than comparable weight nylon, at least at the weights and with the coatings typically found in tents.Even if there is a slight advantage to polyester, there are other factors (primarily coating type and individual variations in fabrics) that overshadowed the difference between polyester and nylon in this test. It's safe to say polyester’s blanket reputation as a UV heavyweight seems to be overhyped.
EFFECTS OF COATINGS ON UV RESISTANCE
As we note in our fabric coatings article, the waterproof coating that’s applied to the fabric has almost as much effect on the properties of the fabric as the fabric itself. This is true for UV resistance as well. Our three lowest-performing fabrics were all sil/PE-coated (two polyesters and a nylon), rather than sil/sil. Since we pretty much only use PE coatings in our floor fabrics, UV isn’t a big factor, but it’s worth noting if you’re shopping for tents elsewhere (though why would you do that?), as most tent companies use sil/PU or sil/PE flysheet coatings.
By far the most significant variable as far as coatings are concerned was the presence or absence of titanium dioxide. The three clear winners in our testing all had TiO2 coatings. This is what we expected, since the TiO2 was added to the coatings specifically to increase their UV resistance. To the best of our knowledge, no lightweight tent fabrics use TiO2 (it adds significant weight and cost to the coating), so for most people this won’t be an option in their tent purchasing decisions.
When deciding on a lightweight backpacking or mountaineering tent, a more likely scenario would be a choice between sil/PE or sil/sil flysheet fabric. While we didn’t test many sil/PE fabrics as our flysheets are all sil/sil anyway (except our LFD and BFD, which use TiO2 with PU for waterproofing) we tested both a sil/sil and a sil/PE 20D nylon and the sil/sil nylon was clearly superior. Our bottom three performers were all sil/PE coated. We’re currently doing more testing to investigate the degree to which the coating formulation affects UV resistance, but the current trend is that sil/sil coatings perform better in UV than PE or PU. If you didn’t skip the chemistry bit at the beginning of this article this should make sense, because silicone is inorganic whereas PU and PE coatings are organic. Since organic compounds are more susceptible to UV damage, PE/PU coatings become brittle and delicate, just like the fabric underneath them, which decreases the tensile strength of the fabric.
NYLON 6 vs. NYLON 66
Generally, we prefer nylon 66 to nylon 6 where feasible because of its lower water absorption and increased abrasion resistance. Also, our anecdotal experience has been that nylon 66 tends to perform better in UV than nylon 6, but the results of this round of testing are inconclusive. We only tested two varieties of nylon 66 in this test, our incredible 10D and a 40D, both with sil/sil coatings. The 10D (have I mentioned how great it is? It’s really great) did unbelievably well, whereas the 40D didn’t do as hot. However, the 40D used a slightly different formulation of silicone coating that our current round of UV testing seems to be indicating is not as resilient as the coating used on the 10D. Even if that is the case, it would mean that the coating composition was a bigger factor than the type of nylon. Based on the results of our first round of testing, it’s hard to say with any confidence if there’s a practical difference in UV resistance between nylon 6 and nylon 66, though we’ll have more results in a few months that will hopefully provide more conclusive data.
PRACTICAL IMPLICATIONS
So, what does all of this mean for you in practical terms, and how can you mitigate the impact of UV damage on your tent to maximize its lifespan? Leaving these fabrics on the roof of our studio day in and day out is a pretty extreme scenario that (hopefully) is more than most tents will experience in their normal life, but the results can inform both our tent selection, use, and care and storage.
How trip style affects UV exposure
Your backpacking style plays a big role in the amount of UV your tent gets exposed to. If you tend to move camp every day, your tent will only be up during the day for a few hours, and it will be inside your pack when the UV index is highest during the middle of the day. In this scenario, such as during a typical thru-hike, you’ll only get an hour or two of sunlight on your tent a day, and those will be the mildest daylight hours in terms of UV exposure. In this kind of use, a typical 5-month PCT hike (and this is a very rough estimate, don’t @ me) might translate to one month’s worth of our testing (assuming 14 hours of daylight on average during our test and just under 3 hours of daylight tent time per day on a 150 day thru hike), before taking into account the fact that our fabrics were on our roof even during the strongest periods of sunlight. This isn’t enough to fatally compromise any of the fabrics we tested, though it was enough to weaken some of them significantly. Take into account bad weather and tree cover (if you’re an AT hiker, that is) and the fact that the UV index is often several times higher around solar noon than in the hours preceding and following it, and the chances are if you’re thru-hiking and moving camp every day, you’re probably going to break something else on your tent before your flysheet fails the finger test. But take too many zero days or bring your tent on more than one thru-hike, and you’re into UV damage territory, and there’s a better chance that a gust of wind will rip your guy points off.
However, if you tend to hike in to a basecamp and leave your tent up for longer periods of time, especially at altitude, UV becomes much more of an issue. The most extreme example of this is expedition-style mountaineering, where basecamps can be left up for weeks or months at a time. This is why we spec TiO2 fabric on our expedition basecamp domes. But even in less extreme conditions, like backcountry ski trips or even backpacking trips where you camp for extended periods between moving camps, a few weeks of use a year add up quickly when you’re leaving your tent set up all day, and this is where UV becomes a factor for tent fabrics. Assuming you keep your zippers clean and dry out your tent before you put it away (and you bought a tent without any PU coatings, like a SlingFin for example…) you may reach the end of your flysheet’s lifespan before other parts of your tent become worn out.
Maximizing gear lifespan
Mitigating UV exposure isn’t rocket science, and if you’ve made it this far into this article, there’s a good chance that you might be the kind of tent user for whom UV damage might actually be an issue. UV and visible sunlight go hand in hand, so anything you can do to minimize your tent’s exposure to sunlight will prolong its lifespan. If you don’t plan on moving camp, try to find campsites that are shaded, at least during peak UV hours (midday) and even consider moving your tent under tree cover after you get up in the morning. If you use a footprint, you could remove it from under the tent when you’re not inside and spread it over the top to share the load.
A quick field anecdote- mountaineers on extended trips often maintain the loft of their down bags by drying them on top of their tents in the sun every day. After seasons of use, some actually reach the point where the sleeping bag itself falls apart because of this intermittent UV exposure. While prolonging the lifespan of their flysheet is probably not top of mind in this scenario, it’s certainly a helpful byproduct of this practice.
OneUp on Shishapangma in Tibet. This particular tent was used heavily at high elevation in the Himalaya, came back to the US, did a tour of duty at Burning Man, and subsequently met its demise when a chunk of ice fell straight through the UV-cooked flysheet during a ski tour at Crater Lake in Oregon.
Taking down your tent when you’re not moving camp is kind of a bummer, but I guess if you’re really looking for something to do in camp you could try that as well. My personal recommendation would be to buy multiple tents and in so doing reduce the UV exposure to each one. I’m no mathematician, but my rough estimate is that a four tent rotation can reduce UV exposure for each tent by up to 75%. Email me regarding bulk discounts.
Storing your tent to minimize UV exposure
The sneaky UV killer is improper storage. Even window-filtered sunlight has plenty of UV. My parents store their gear in a loft in the garage directly underneath a skylight. I’ve ripped handles off duffel bags, torn stuff sacks, put my butt through fabric chairs, you name it. The sun exposure through the plexiglass window was enough to completely fry even heavy fabrics (nylon, polyester, and cotton) over a couple years of storage. If your living space is cursed with ample natural light (I can’t relate) you’ll have to figure it out. Find a dark closet or use opaque bins for gear storage. Just stick ‘em where the sun don’t shine.
Takeaways
UV exposure is only one of a slew of variables that determine how long your tent will last. Managing your tent’s exposure to UV is just another facet of being a good tent parent. Knowing how you plan to use your tent will help you determine how heavily to weight UV resistance when making buying decisions.That being said, all fabrics are individuals. In our tests, fabric performance was not always consistent with our expectations based on weight, color, etc. Without testing, it’s hard to predict how well a fabric will perform in real-world conditions.
Hopefully, you've found some nuggets of nerdy goodness buried in this article, whether you're just curious, looking for a new tent, or learning how to care for your current one. If there's anything else you want to learn about, check out the rest of our blog or drop us a line to ask us questions!
]]>
https://www.slingfin.com/blogs/the-beta/how-to-replace-bent-or-broken-tent-pole-sections2021-09-14T16:25:25-07:002024-09-23T14:02:48-07:00How to replace bent or broken tent pole sectionsTim Hunt
In this video, we walk you through how to replace individual sections of your tent poles that may have bent or broken. It's a quick and easy way to repair a damaged pole set without needing to replace the whole thing.
]]>
https://www.slingfin.com/blogs/the-beta/how-to-strengthen-your-portal-in-heinous-weather2021-02-26T11:20:36-08:002021-02-26T11:20:36-08:00How to strengthen your Portal in heinous weatherTim Hunt
Are you looking to do some winter camping with your Portal? Or do you live somewhere with freak snowstorms year round? The Portal can handle it, but it helps if it's being used properly. Would you buy a fancy new sports car and then put apple juice in the gas tank? Of course not. Would you buy a fancy new tent and then not learn how to use all the fancy features that make the tent so great? I hope not! In this video you'll learn how to use the features that help the Portal redefine the limits of a three-season backpacking tent.
]]>
https://www.slingfin.com/blogs/the-beta/introducing-the-updated-crossbow-four-season-tent-video2021-02-26T10:55:10-08:002021-02-26T11:20:56-08:00Introducing the updated CrossBow Four-Season Tent (video)Tim HuntMore]]>
In this video, we'll walk you through the features and other laudable characteristics of our most versatile, lightweight, and livable four-season tent, the CrossBow.
]]>
https://www.slingfin.com/blogs/the-beta/how-to-fix-snags-in-your-tents-mes2020-02-28T15:48:00-08:002020-02-28T15:52:13-08:00How to Fix Snags in Your Tent's MeshTim tim@slingfin.com
In this video, we explain how to fix snags in your tent body's mesh canopy. Lightweight mesh can develop small imperfections from snagging on velcro, clothing, vegetation, etc. These "snags" are due to fibers in the mesh sliding over each other. Fortunately, they are neither permanent nor detrimental to the function of your tent. They don't affect bugproofness, and they won't propagate to larger tears. They're also easy to remove in a few seconds with the techniques described in this video so you can get your tent looking fresh for the 'gram.
]]>
https://www.slingfin.com/blogs/the-beta/how-to-add-internal-guylines-to-your-lfd-kahiltna-dome-or-bfd2020-02-08T13:29:00-08:002021-09-14T16:32:52-07:00How to add internal guylines to your LFD, Kahiltna Dome, or BFDTim tim@slingfin.com
Tents with high wind profiles, like our big domes, can be vulnerable in strong wind events. Internal guylines are a great way to reinforce your tent during strong winds or snow loading. They can be installed once and left up until they're needed without having to re-install them every time the tent is set up or taken down. Especially when used in conjunction with traditional external guylines, internal guylines help your dome withstand far more severe winds and snow loading than it otherwise could. This video runs you through internal guyline installation in our big domes, and also explains some of the theory behind internal guylines.
Curious about what the Big Deal is with our Big Domes? In this video we give you the grand tour of our flagship expedition tents, the LFD and BFD.
]]>
https://www.slingfin.com/blogs/the-beta/how-to-dry-pitch-your-tent2019-12-02T20:00:00-08:002019-12-02T20:00:45-08:00How To Dry-Pitch Your TentTim Hunt
We can't have beautiful weather all the time. If we did, I'd be out of a job. Eventually, you're going to have to set your tent up while it's raining. In this video, we walk you through how to set up your tent fly-first so it stays dry on the inside, even in heinous conditions.
]]>
https://www.slingfin.com/blogs/the-beta/how-to-replace-tent-pole-shock-cord2019-10-25T12:27:00-07:002019-10-25T12:27:57-07:00How to Replace Tent Pole Shock CordTim Hunt
In this tutorial, we show you how to replace the elastic shock cord in all of our DAC poles. The aluminum poles themselves will last much longer than the cord inside, and replacing the shock cord when it loses elasticity will get you many more years of use out of your tent.
Chances are you'll need to replace the shock cord in your tent poles at some point. Shock cord loses its elasticity over time, whether it's synthetic or natural rubber. Heavy use in cold weather accelerates this process. Replacing the shock cord in your tent poles when it loses elasticity will make assembling your tent much easier. It also insures that your pole sections will be fully seated on the inserts, which helps prevent the ends of the tent poles from cracking.
]]>
https://www.slingfin.com/blogs/the-beta/fabric-coatings-101-pu-vs-pe-vs-silicone2019-06-13T15:42:00-07:002023-07-09T10:13:44-07:00Waterproof Fabric Coatings 101: PU vs. PE vs. SiliconeTim HuntMore]]>
One of the most important functions of a tent is (obviously) to keep you dry. This is almost always accomplished by using waterproof fabrics. In a traditional double-wall tent, there’s a waterproof outer layer called a fly or flysheet and a breathable inner tent body with waterproof floor and sidewalls. The fly is usually made of a woven fabric (learn more about wovens vs. nonwovens in our article on fabrics). Usually it’s nylon in higher-end tents and polyester in less expensive tents, although lightweight polyesters have recently been gaining a staunch following in the ultralight backpacking community because they absorb less water than nylon.
However, woven fabrics alone are not waterproof. The most common way to produce a waterproof fabric is to apply a waterproof coating to an uncoated fabric. Coating involves the application of a liquid that adheres to the fabric and then is cured, leaving the fabric waterproof.
The fabric finishing process begins with an undyed, uncoated fabric, called greige (pronounced GRAYGE). After the fabric is dyed, the fabric coater will apply one or more layers of coating (sometimes different coatings to each side of the fabric). Different coatings have different properties that make them ideal for specific applications. The weight and composition of the fabric as well as the intended application are both important factors in coating choice. In this article, we’ll be taking a journey of discovery through the most common waterproof coatings used in tents: polyester urethane (PU), polyether urethane (PE),and silicone, and combinations thereof.
Waterproofness
Before we get into the really exciting stuff, a quick note about how the outdoor industry quantifies waterproofness: waterproofness is typically measured via a process called hydrostatic head (HH) testing. This technique determines how much water pressure must be exerted on a fabric before it begins to pass through. This is accomplished by measuring how tall a column of water is before the weight of the water exerts enough pressure to start pushing it through the fabric. A good way to visualize this is to picture a tall tube with a piece of fabric stretched across the bottom end. The tube gets filled with water until it soaks through the fabric. The height of the water (in millimeters) in the tube just as the water begins to penetrate the fabric is called the hydrostatic head rating. This is why the unit for waterproofness is millimeters (mm) and also why the waterproofness of a fabric is also referred to as a “water column”. A fabric is generally considered waterproof if its water column is around 1,000mm or more.
A quick aside so we don’t anger the technically inclined and easily incensed: it’s unwieldy to test waterproof fabrics in this method, as you would need a really long tube (some coated fabrics can exceed 10,000mm, which translates to a 32 feet 9 3/4 inch tall water column). These days, this test is usually done with a device called a SuterTester, which uses a high-pressure pump to force water through the fabric instead of gravity, and then calculates the equivalent mm rating. We’ll go more in depth into SuterTesting in future articles.
Coatings have several attributes that must be taken into consideration when choosing a coating for a particular use case:
Waterproofness: While all three of the main coatings are waterproof initially, some coatings cannot achieve very high hydrostatic head ratings, and some can absorb water, or “wet out” when exposed to moisture for extended periods of time.
Durability: Coatings affect the tear strength of the fabric to which they’re applied by enhancing or reducing the fabric’s elasticity.
Longevity: Coatings can have finite lifespans. Factors like mold growth and hydrolysis (breakdown of the coating) are more prone to affect some coatings more than others.
Ability to accept fire retardants: If fire retardant chemicals are being used, they must be mixed in with the coating before it is applied to the fabric. FR chemicals can only be combined with PU and PE coatings, not silicone. Although FR chemistry is no longer required, many tent companies still add toxic FR chemicals to their tents. All SlingFin tents are FR-free.
UV resistance: After conducting extensive UV testing on a variety of different tent fabrics with different coatings (learn more about that here) we have found that the composition of the coating most likely plays a significant role in a fabric's lifespan.
One last note before we get to the good stuff. Occasionally, you may come across tents made with fabrics that are waterproof without the use of a coating. These fabrics are usually laminates (multiple layers of material sandwiched together and adhered with heat or adhesive). Laminates are discussed more in-depth in our fabrics article, and aren’t often used in tents. The laminates you’ll usually see used in shelters are Dyneema Composite Fabric (aka Cuben Fiber) and waterproof breathable fabrics (WPBs) that are used in most single-wall tents. Single wall tents have a very limited use case as they manage condensation very poorly, even when made with waterproof breathable fabrics. While WPBs often have a Durable Water Repellent (DWR) finish, they don’t get their waterproofness from the DWR. Instead, WPBs utilize a microporous membrane that blocks water droplets but theoretically allows water vapor to pass through.
Polyester Urethane (PU)
Polyurethanes are a broad class of polymers encompassing two of the three common fabric coatings: polyester urethane (PU) and polyether urethane (PE/PeU). Because PU is much more common than PE, when the outdoor industry says “polyurethane”, they’re talking about polyester urethane, and that’s what this section is about. Yes, I know that from a strict organic chemistry perspective “PU” should technically encompass both polyester and polyether urethanes, but this isn’t an organic chemistry class (thank goodness) and I’m going to use the verbiage the outdoor industry has adopted as standard. If this bothers you then you should stop reading now and go camping instead. PU offers a solid balance of attributes, which is why it is by far the most popular waterproof coating for tent fabrics. PU can achieve high hydrostatic head ratings, it can accept fire retardants to meet bygone fire retardancy standards, it’s inexpensive, and it doesn’t reduce the fabric’s tear strength as much as PE coatings do. For tents that will be exposed to large amounts of moisture, PU coatings are often used because they can achieve hydrostatic head ratings in excess of 10,000mm (that’s a lot). This makes PU ideal for applications when there will be a lot of pressure exerted on a fabric, like if you’re using a cot in your tent.
Although PU is the standard and works pretty well under a variety of conditions, there are some drawbacks that make us think that PU is over-utilized in tents. The first issue we have with PU is that it decreases the tear strength of the fabric to which it is applied. This happens because of the way the coating affects the slippage of the fabric. Slippage is when the individual fibers that make up a fabric, or yarns, slide over one another. When you try to tear a fabric, slippage allows the yarns to bunch up, rather than remaining fixed in position. To propagate the tear, you’ll have to rip through several yarns at once, rather than one yarn at a time. This distributes the stress on the fabric over a larger area, thus reducing the force and making the fabric less likely to tear. In the case of fabrics with low slippage, adjacent yarns are not recruited to resist the stress, which then gets applied to only one yarn at a time. This means the stress is much more concentrated and the fabric is more likely to tear. As you would expect, ripping through five yarns at once is harder than ripping through one, and a fabric with more slippage will have a higher tear strength. PU coatings get in between the yarns, and lock them in place. This reduces slippage and consequently reduces the tear strength, making PU-coated fabrics slightly weaker than the fabric before coating.
Long-term waterproofness is another area in which PU coatings have some drawbacks. While it is quite counterintuitive, PU coatings are actually hydrophilic, which means they will slowly absorb water if they remain in prolonged contact with it. Water takes a long time to penetrate PU, which is why PU works as a waterproof coating. However, if there’s enough moisture in the environment, water will eventually saturate the PU coating and go into and through the fabric, causing the coated fabric to leak. This is rarely an issue in terms of water actually penetrating into a tent, as the process is quite slow. However, it can be problematic if you’re camping for a long time in especially wet areas or in a spot where water pools under your tent. This problem can be addressed by applying very thick layers of PU, meaning the water will take longer to penetrate the fabric. However, this has the disadvantage of adding considerable weight (coatings, especially PU coatings, are surprisingly heavy) and further reducing tear strength. PU’s water absorption causes a few additional problems. First, waterlogged PU coatings take longer to dry out. Second, as we discussed in our fabrics article, nylon will sag when it gets wet, so PU-coated fly fabric has the tendency to sag. This makes it difficult to maintain a taught pitch in humid and wet conditions. Some designers combat this by using polyester instead of nylon but that approach has its own problems. The final issue, and the biggest threat to your tent’s well being, is increased susceptibility to mold and mildew. Mold and mildew are some of the top tent killers out there. Like all living things, they need water to survive, and when they have a moisture-rich environment like a waterlogged PU-coated fabric the mold can destroy the coating, leading to a foul smelling tent with compromised waterproofness. For this reason, storing a PU-coated tent long-term when it’s still wet means almost certain death to your fabrics. Extra care must be taken to make sure it’s absolutely, positively bone-dry before you put it away for more than a day or two. Storing your tent in a dry environment will also prolong the life of your tent. Humidity alone can destroy coated fabrics and factory hot-taped seams.This isn’t to say that non-PU-coated tents should be stored wet. That’s also a huge no-no. Uncoated (i.e., breathable) tent canopy fabrics will absorb water and grow mold, but at least your silicone or PE-coated floor and fly might be spared.
Sil/PU coatings
PU (and rarely PE) coatings are often used in tents in conjunction with silicone coating. This combination is usually referred to as sil/PU. This means one side of the fabric (usually the inside) is coated with PU and the other side is coated with silicone. This combination provides some of the benefits of silicone (more hydrophobic, better long-term waterproofness, etc.) and still allows the requisite fire retardants to be mixed into the PU side to achieve CPAI-84 standard. However, there are some drawbacks to this. First, the tear strength of sil/PU fabric is still lower than the tear strength of the fabric before coating because of the PU. Also, because the two coatings are not applied simultaneously, achieving the ideal thickness on each side of the fabric is a tricky balancing act. The silicone cannot be allowed to penetrate all the way through the fabric. If it soaks in too far while it’s being applied, it can lead to coating adhesion failures when the PU is applied. Almost nothing adheres to silicone (which is why it’s the material of choice for non-stick spatulas and many industrial lubricants), including PU coatings. If the PU is applied to silicone-saturated fabric it can peel off prematurely, leading to compromised waterproofness. Additionally, the PU component of this coating technique is still not immune to hydrolysis (discussed below), and will eventually break down.
Hydrolysis: PU’s Achilles’ Heel
Many of you may have noticed a peculiar smell emanating from your old tent. It falls somewhere on the spectrum around vomit, smelly gym clothes and old raisins and permeates my early memories of camping with my parents. Despite its nostalgia, “Old Tent Smell” means that your beloved tent has entered its sunset years. The odor is a byproduct of a reaction called hydrolysis. The propensity of a coating to undergo hydrolysis, or hydrolyze, is called hydrolytic stability. Of the three coatings discussed here (PU, PE, and silicone), PU has the worst hydrolytic stability. Over time, the PU coating reacts with moisture in the air (this process is accelerated by heat) and splits the polyester urethane molecule. The products of this reaction are smelly, sticky, and are not waterproof. The irony that the cause of the stench is “PU” is not lost on us. The reaction can be delayed as long as possible by storing your tent in a cool, dry, dark place, but sooner or later it will succumb to the stinky inevitability of organic chemistry. When I first encountered this on my dad’s 1970s North Face VE-24, I tried as many homespun cures as I could, to no avail. Unfortunately, once hydrolysis has begun, there’s no stopping it. While a good scrubbing may temporarily get rid of some of the most offensive volatiles, it’s a purely symptomatic treatment. Even if you can get rid of the smell, your coating is still on its way out and won’t stay waterproof for much longer. Because of hydrolysis, fabrics with PU coatings essentially have a shelf life. It may take a decade or more, but even if you treat your tent with the utmost care, it will eventually hydrolyze. This doesn’t factor in much to most companies’ decisions to coat their fabrics with PU, as it’s assumed that something else on the tent will break or you’ll upgrade before hydrolysis becomes a problem. However, if you’re hoping to be using your tent a decade from now, then it would be a good idea to seek out tents without PU coatings.
Polyether Urethane (PE)
Polyether urethane is the other member of the polyurethane family that is used in outdoor applications. It is far less common than PU, probably because it’s more expensive and simply because it’s not as well known. PE has similar characteristics to PU in that it can be combined with fire retardants and is applied in a similar manner, but with a few major differences that make it better for some applications and worse for others. Generally speaking, PE is used in burlier tents in harsher environments. It’s a fairly popular choice for floor fabric in expedition tents, where weight is less of a concern and long-term durability is paramount.
Waterproofness, durability, and longevity are all intertwined with PE coatings, so it’s hard to address each characteristic separately. It’s easiest to start with PE’s greatest disadvantage, and work from there. PE coatings stretch even less than PU coatings, and they all but eliminate slippage in the fabrics to which they’re applied. The result is that PE coatings oftendecrease the fabric’s tear strength. We use PE-coated fabrics on the 70D and 210D floors of our expedition series tents, because those fabrics start out with an extremely high tear strength, so the burliness of the fabric itself is more than enough to compensate for the reduction in tear strength by the PE coating. It is uncommon to find PE coatings applied to lightweight fabrics. After years of searching, we finally found a 20D lightweight PE-coated fabric that was strong enough to use on the floor of our Portal tent. It’s the only PE-coated fabric we’ve seen under 70D with a tear strength high enough for us to use in a tent.
So why would you want to use a PE coating if it compromises the fabric’s tear strength? PE has several advantages that make it a great choice for floor fabrics. First, it does not absorb water like PU coatings. It’s hydrophobic and even when left in prolonged contact with water, it doesn’t wet out, even when compared to a PU fabric with a better water column. The main benefit of this in terms of durability is that PE-coated fabrics are extremely mold and mildew-resistant. Because the coating keeps the fabric dry on the inside, there’s no moisture to support mold growth.
The other big advantage to PE coatings is their great hydrolytic stability. They are far less prone to hydrolyzing than PU coatings. We almost never come across hydrolyzed PE coatings, and the ones that we have encountered have usually been used for a long time in particularly hot and humid conditions (if you want your tent to last a long time, don’t move to the Philippines or Singapore).
If long-term durability is a concern for you, or you’re mostly going to be using your tent in hot, humid places, look into a tent with PE coated fabrics. PE coatings are not nearly as easy to come by, as they haven’t been fully embraced by the industry yet. I know of only a few companies that use them, and two of them (SlingFin and Mountain Hardwear) were founded by the same person. However, because they can be mixed with fire retardants, PE makes it possible to avoid many of the shortfalls of PU coatings and still add fire retardants. In our opinion, PE coatings are under-appreciated and underutilized. As tent designers start thinking harder about why they’re using the materials they’re using (and read this article), expect to see PE coatings becoming more and more popular. We use PE coated fabrics in most of our floors, which are seam taped and are not subjected to as much UV radiation.
Silicone
Spatulas, lubricants, sealant, greases, implants, wire insulation, and tents? The chemical properties that make silicone such a diversely utilized class of compounds (nonstick, chemically inert, hydrophobic) also make it an excellent material for waterproofing tent fabrics. To differentiate pure-silicone coatings from sil/PU coatings, they are most commonly referred to as sil/sil fabrics, which indicates that silicone was applied to both sides of the fabric. Some names for specific fabrics using silicone coatings are silnylon (referring to nylon that has been silicone coated) and silpoly (silicone coated polyester, which is less common due to polyester’s lower tear strength but is sometimes used in tarps). Sometimes you’ll see misleading things like “fly and floor are silicone treated”, “coated in a durable silicone repellent”, or “silicone-treated ripstop nylon”, when companies are actually using sil/PU or sil/PE fabrics, so make sure to get into the nitty-gritty tech specs to make sure you actually know what you’re getting. Sometimes you even have to call brands to get a straight answer.
Unlike polyurethanes (both PU and PE), silicone is an inorganic polymer. The molecules that comprise organic polymers have carbon backbones, whereas silicones are built around a highly stable Si-O bond. This is the basis for silicone’s chemical inertness. Silicone is much more inert than polyurethanes, which means it’s less prone to react with other compounds (e.g. hydrolysis). This is why it’s possible to make silicone that’s safe for use in cooking tools or internal applications like implants. But you’re not eating (much) food off your tent, so what makes silicone so great for tents?
The amount of silicone that can be applied to a fabric is limited by the thickness of the fabric. With PU coatings, you can keep slapping coat after coat on the outside of the last coat, which is how you can get such high HH results. That’s not so easy with silicone, so the main drawback of silicone coatings is that it’s hard to get water columns much higher than 1500mm when you’re using lightweight fabrics. This hasn’t been an issue in our experience. Even with the 1500mm 30D sil/sil nylon used in the floor of our WindSaber, we have not had any issues with leakage, except when one user set theirs up on top of a small stream. Under normal conditions, silicone is so hydrophobic (when’s the last time you had to wring out a spatula?) that wet-out is not a concern. Sil/sil fabrics absorb little if any water. Because silicone keeps your nylon from soaking up water, fabric stretch due to moisture is greatly reduced and your fly (or tarp) will stay much more taught when wet. You can get your fly almost totally dried out just by giving it a good shake. This also means that silicone imparts an unmatched level of mold/mildew resistance. We have never seen a case of mold growth on a silicone-coated fabric (again, this doesn’t mean you should put your tent away wet! Don’t do it! Don’t even think about it!). The cherry on top (or maybe the sundae itself, depending on your priorities) is that silicone coatings don’t hydrolyze. We have never seen a sil/sil fabric go bad. This is a big deal. As long as you store your tent properly, your sil/sil fabrics will outlast all other coatings and coating combinations.
Another huge benefit of silicone is that unlike PU and PE, silicone coatings actually increase the tear strength of the fabric to which they are applied. As I mentioned above, silicone is often used as a lubricant. When silicone coats the yarns in a fabric and is cured, as it does when it is applied as a coating, it makes it easier for the yarns to slide over one another. This increases slippage and therefore the tear strength. Sil/sil fabrics often have significantly higher tear strengths than the same fabric with a PU or PE. For this reason, silicone is often applied in small quantities to enhance the tear strength of non-waterproof fabrics.
UV Resistance
All fabrics are damaged by UV radiation, which is present in sunlight. For a deep dive on UV damage and fabrics, check out this article. I alluded earlier to the fact that PU and PE coatings are organic polymers, whereas silicone is an inorganic polymer. There's a lot of chemistry we won't go into now, but basically, organic polymers are more susceptible to UV degradation than inorganic polymers. That means that PU and PE coatings break down much more quickly when exposed to sun. When the coatings become UV-damaged, their waterproofness decreases, the fabric becomes brittle, and its strength decreases rapidly. While silicone coated fabrics are by no means immune to UV damage, they tend to keep their waterproofness and strength for longer than PU and PE coated fabrics.
Takeaways
You may have gathered from this that at SlingFin, we prefer to use sil/sil fabrics wherever possible. So why aren't they ubiquitous? I can’t vouch for what other designers are thinking, but there are a few hurdles between silicone’s current level of use and the total market domination it deserves. The first is price, which is unfortunately always a consideration when selecting materials. Sil/sil fabrics cost significantly more on average than their sil/PU counterparts. In my experience, the same base fabric with a sil/sil coating costs 10-30% more than it would with a sil/PU coating. That’s not a huge issue for SlingFin, since the price point market has never been (nor will be) our focus. Another issue is that PU is simply the way everything has been done for many years, and it can be surprising how reluctant many companies are to deviate from the standard.
There are a few minor issues with silicone from a functional standpoint. One is that it can’t be seam taped effectively. For this reason, most of our tent floors are made with sil/PE fabric. Seam tape is what keeps sil/PU or sil/PE fly fabrics from leaking through the needle holes created when the tent is sewn. There is one company that offers stuff sacks with seam-taped sil/sil fabric, but I've seen enough of their seam tape fail to make me think they haven’t perfected it yet. Fortunately, there are a couple solutions for tents. A seam style known as “double needle lap-felled” increases seam waterproofness and can reduce or eliminate the need to seal or tape the seam when you're using sil/sil fabrics. With the DNLF seam, each stitch goes through four layers of fabric. It’s a fairly specialized technique but most premium factories have this capability. During extended hard rain, some water can wick in through the thread, but we've only seen this issue with consistent heavy rain that lasts at least several hours.
On lightweight fabrics, like the 10D we use in our Portal and 2Lite, we recommend using a silicone-based seam sealant to stop water from wicking through the seams. This cannot be done in the factory because of long cure times, and is another reason sil/sil fabrics have not taken off at scale. We seal our Portals and 2Lites to order by hand in our studio in Berkeley.
DNLF seams aren't as effective with PU or Sil/PU fabrics as the PU wets out and facilitates moisture wicking in through the thread. Single needle seams will need to be sealed after construction with a liquid seam sealer. All our sil/sil flies are sewn with double needle lap-felled seams. Another issue is that because sil/sil fabrics can be quite slippery, so some people don’t like to use them in floors. We currently use sil/sil fabric for the floor of our WindSaber tent, and thus far the slipperiness of the fabric hasn’t proven to be an issue for us.
Until recently, one of the biggest obstacles preventing sil/sil fabric from gaining market share was that silicone coatings can’t be combined with fire retardants to meet what's called the CPAI-84 standard for fire retardancy. A few years ago, there were seven states that still used CPAI-84 as the standard for flame resistance in recreational camping tents, including California. Amidst growing concerns around the health risks of fire retardants, CPAI-84 has recently been discarded as a standard across the US, thanks to urging from the outdoor industry. Still, tent makers have been slow to switch to sil/sil coated fabrics.
In our experience, silicone has proven to be the best tool for making a fabric durably, reliably waterproof. Silicone-coated fabrics last longer and have numerous advantages over PU and PE coatings. At SlingFin, we’ve been using sil/sil nylon 66 ripstop in our expedition series tents since their inception. As we expand our use of sil/sil fabrics into the Portal and SplitWing tents this year, we’re confident that SlingFin is on the forefront of an industry-wide shift in the way fabrics are used in the design and construction of tents.
Our patented WebTruss combines the best qualities of clip-style tents and pole sleeve tents. It makes the tent easy to pitch in high winds like a clip-style tent but still provides the stable architecture of a tent with pole sleeves. Pioneered on our alpine tents, it is also available on our all-season CrossBow tents. This video explains the theory and innovation behind the WebTruss.
]]>
https://www.slingfin.com/blogs/the-beta/outrigger-attachment-how-to-reinforce-your-tent-with-trekking-poles2019-04-11T16:30:00-07:002019-04-11T16:31:01-07:00OutRigger Attachment: How to reinforce your tent with trekking polesSlingFin Admin
In this video, we walk you through the use of the OutRigger attachment found on our Portal, CrossBow, and WindSaber tents. The OutRigger lets you use your trekking poles or ski poles to reinforce your tent against high winds and snow loading, turning it into a burly four-season fortress without carrying any additional weight. How neat is that?
]]>
https://www.slingfin.com/blogs/the-beta/volume-adding-a-new-dimension2019-02-26T09:29:00-08:002019-03-11T11:51:02-07:00Volume: Adding a New DimensionSlingFin Admin
The internal volume of a tent makes a huge difference in the tent's livability, but it is rarely discussed by manufacturers. How should you consider volume as a factor when deciding which tent to purchase?
Areas marked with a red "X" indicate where the occupant’s body extends past the spatial boundary of the tent body.
Introduction
Can you really call it a two-person tent if it’s not usable by 2 people? The rush to make lighter and lighter tents has led manufacturers to make tents that are so small they are often not livable or functional for their stated capacity.
Weight is important but so are livability and function.
The users should ask themselves what functional features they are willing to give up in order to reach their target weight. What is the balance between having a light tent versus a livable or functional tent? Is the vestibule large enough for your pack, boots and gear? Is the vestibule large enough to cook in? Does the tent have a dry entry? Is the stated square footage usable or are the sidewalls and tent corners so steep that the measurements are, for all practical purposes, useless?
In the era prior to the Internet, a tent buyer would shop for a tent by first looking at catalogs then visiting a store and getting inside the tent before picking the “right” one. These days the average tent buyer (of technical, ultralight or lightweight tents) spends 4 to 6 hours researching their options online prior to making a purchase. The trouble with relying on current online tent metrics is that the livability and functionality of a tent are not known until you get inside the tent and see for yourself.
To help the tent buyer, SlingFin has added several new specification metrics to its current list of tent specifications: Tent Body Volume, Vestibule Volume and Weight. We encourage the outdoor specialty tent manufacturers to include tent volume specifications to their list of tent specs. Some companies like Nemo and Sierra Designs have already begun similar efforts and we really hope the momentum continues leading to an industry-wide consensus. We also want to encourage gear testers to include tent and vestibule volumes with their reviews.
Methodology
Calculate the tent body and vestibule volumes.
With the improvements in technology and 3D imagery, it is now much easier to create 3D models, calculate volumes of complex shapes and convey spatial images to customers virtually.
Tent and flysheet measurements can be manually entered into a 3D solid modeling CAD program or, if you have access to a 3D scanner, then by all means scan away. When the tent and flysheet are modeled, the 3D CAD program can calculate the volume of the tent body and/or vestibule(s). You can also calculate the area or volume at any height or cross section of the tent/vestibule.
We have 3D modeled our two TreeLine tent style (2Lite and CrossBow 2) as well as a few popular models from other manufacturers.
Calculating the weight-volume index
Once we have the weight and volume measurements of the tent body and vestibule(s) we can calculate the weight to volume ratio, giving us what we call the weight-volume index, which is the total minimum tent weight divided by the total volume (tent body and vestibules). This measurement, in ounces per cubic foot, will allow users to compare tent models based on how much living and storage space the tent offers for the weight. This number is a valuable piece of information because it describes numerically how efficient the weight is that you are carrying.
For example, a tent with a weight-volume index of 0.61 oz/cu-ft is a better use of weight than a tent with an index of 0.82 oz/cu-ft, even though the latter tent may be lighter overall. In the example pictured and above, both tents have a square footage of approx. 28 sq. ft, but have much different weight and volume measurements. Overall weight is important, but for those who count ounces, understanding that an extra 13 oz may also translate into an additional 34 cubic feet of usable volume, it could easily justify the weight (stated trail weight of 44 oz vs. 31 oz). This means there is an additional 34 cubic feet of volume for yourself, your gear, your partner, dog, etc. Note, that there is some ambiguity in the term “weight“ and that will need to be precisely clarified in any index using “weight“ (see *1 below).
Mapping
3D imaging software has the ability to “map” the inside of the tent or vestibule with shapes and objects. Human figures (lying down or sitting up), pads, sleeping bags, etc. can be easily added to scale. Using 3D models to visualize, or map, interior spaces is the next step in evaluating tent specs, particularly when the tent is not physically in front of the shopper. Mapping will be especially helpful for tall individuals who are looking for lightweight tents. It will also help communicate how a tent solves, or fails to solve, other factors impacting tent livability.
Conclusion
Every individual situation has its own optimum shelter ranging from a simple tarp (or no shelter at all!) to mountaineering tents that must block spindrift, blunt extreme temperatures and withstand winds that would take many houses apart . We believe it is our job to provide the information a consumer needs to make the purchase that is best for them and their intended use.
When looking for lightweight shelters, buyers need to find that balance between the weight of a tent, its livability and how functional it is. By adding a new dimension into the provided specifications (the tent and vestibule volumes as opposed to just square footage), we hope to help the buyer make the best informed purchasing decision. Better yet, we hope to help pair them with the right gear so that they can best enjoy the great outdoors.
We will leave you with 2 thoughts our friends have shared with us. “Pick the right tent for extreme conditions because you are only a millimeter away from spending the night outside” (Robert Link , www.Mountain-Link.com) and “The heaviest tent in the world is a lightweight tent that failed” (Phil Scott, designer with 50+ years of outdoor design and production experience).
Enjoy the journey as you discover what works best for you!
Martin Zemitis- Designer Richard Ying- COO and Mechanical Engineer Scott Chenoweth- Mechanical Engineer & CAD Specialist
Copyright SlingFin 2018 under Creative Commons License: okay to use with attribution. Please link to this article if quoting or reusing.
]]>
https://www.slingfin.com/blogs/the-beta/bombproofing-your-tent-part-1-windproofing-wind-and-wind-resistance2019-02-26T09:24:00-08:002021-09-14T16:34:37-07:00Bombproofing Your Tent: Part 1-Windproofing - Wind and Wind ResistanceSlingFin AdminMore]]>
Windproofing: How to Secure Your Tent in High Winds - Techniques and Principles.
Worried your tent might collapse in a high wind? Tired of having the top try to flap you to death? Considering extending your range above the tree line and don’t want to buy a whole new shelter?
Here are techniques you can use to harden your tent against high winds (and considerations if you do have to purchase a new tent and want to make sure it can be made resistant to high winds.)
I live in the San Francisco Bay Area...earthquake country!...and have done DIY home retrofitting twice. There’s lots of structural engineering studies on houses. Not so much for tents but, to me, the parallels are obvious and instructive.
There are two clear first steps to harden your typical California house: anchoring and shear walls. I’m going to look at each of those and translate them into things you can do to harden your tent against the wind.
Here’s the house version at a glance along with the solutions.
Anchoring
Problem:
If your house isn’t bolted to its foundation, it could just bounce off. If you’ve ever had a free standing tent go free floating, the parallel should be obvious.
Solution:
Stake out your tent with something as tough as the situation. Besides the stakes shown there are specialized cloth snow anchors and sand anchors.
Shearing
Problem:
High winds cause the tent structure to distort. This results can be unpleasant as the tent flexes and bobs in the wind or dangerous if the poles break or fabric tears.
(Shearing is the lateral impact of the wind against the resistance of the staked out tent. Now that the tent is solidly anchored, the structure needs to be reinforced against the wind in a way that distributes the stress throughout the structure so as not to lead to points of failure with a tent pole break or fabric tears.)
Solution:
Guy lines!
External guying is a great start.This adds significant stability with little effort. Most quality backpacking tents have external guy loops on the fly to allow you to attach cord and create additional stake out points.
Internal guy lines can take it up to a whole different level.Many mountaineering tents have internal guy points as well. They are rarer in backpacking tents but they’re equivalent of the shear walls pictured in the house above.
The stress dynamic might be easier to visual in our (SlingFin’s) instructional video on internal guy lines.
.There’s a critical detail at 1:18 in this video.Note that stress is widely distributed by connecting the internal guy lines to the structure of the tent (both poles and fabric seams are core components of tent resilience) and then connecting that to the external guy lines and ultimately to the anchoring points.
Wind resistance is the result of a system that includes tent architecture, materials, fabrication (in particular the placement of seams), and guy points.
Our company, SlingFin, routinely provides internal guying points in all our backpacking tents. Even if you have a tent that lacks them, though, we hope that this explanation of the underlying dynamic of stress resistance can help you find a solution appropriate to your starting point, intended tent usage, and pocket book. If I was trying to jury rig an existing tent, I think I’d start by seeing if I could attach shearing support directly to the poles without having lines touch the tent body (and, hence, provide a path for moisture to wick back into the tent.)
Our run as SlingFin took that starting point and began with mountaineering tents and gear for guides. It has now extended down mountain to backpacking tents. Our goal is to have the strongest tent in each weight category. Both our 2Lite and CrossBow (as well as the Portal coming in 2019) have internal guy points. Also, if you use trekking poles, both have a version that allows you to add trekking poles for additional super beefy support.
A strong enough wind will, of course, blow down anything...but our mountaineering tents withstand winds that would take apart most houses. We pride ourselves on being the last tent standing!
Copyright SlingFin 2018 under Creative Commons License: okay to use with attribution. Please link to this article if quoting or reusing.
]]>
https://www.slingfin.com/blogs/the-beta/tent-fabric-101-nylon-vs-polyester-vs-dyneema-cuben2019-02-25T17:58:00-08:002022-09-09T16:46:28-07:00Tent Fabric 101: Nylon vs Polyester vs Dyneema/CubenTim Hunt
As in all aspects of tent design, fabric selection is a balancing act. This article is intended to provide users a basic level of understanding of the strengths and weaknesses of the most common fabrics used in tent and tarp design.
As in all aspects of tent design, fabric selection is a balancing act.
Different materials have unique strengths and weaknesses and selecting the “right” fabric is really about choosing which compromises to make. Do you want it to be light, strong, or inexpensive? You can pick two, but you sure as hell can’t have all three. A common assumption is that by buying an expensive product, you’re automatically getting the “best”, most durable product. This may be true for hammers, but for fabrics and tents, there is no “best” option. You could pretty quickly trash a fancy sports car on a dirt road that your late 90s station wagon could handle with ease. It’s the same thing with tents. A top of the line tent for thru-hikers would probably implode in winds that even a basic four-season tent would shrug off. Fabric selection is similar in that before designers make a choice, they have to explicitly decide on the goals for the product. The same is true of people who are purchasing tents. Are you going to be on exposed mountains where you’ll die if your tent fails in a storm? Are you going to retreat to your van as soon as it starts drizzling? Once the parameters have been established, the optimal fabric choice is often clear.
It’s unlikely that you’ll be confronted with a decision between two identical designs with different fabric choices. In fact, your fabric of choice will almost certainly be pre-determined by the kind of shelter you plan on buying. Rather than serving as a buying guide, this article is intended to provide users a very basic level of understanding of the strengths and weaknesses of the most common fabrics used in tent and tarp design: nylon, polyester, and DCF (Dyneema Composite Fabric, formerly known as Cuben Fiber).
Editor’s note: This is part of an ongoing series aimed at providing users with detailed information about design, materials, and construction, so you can make informed purchasing decisions to best suit your needs. If there’s a topic that you’d like to know more about, let us know atthebeta@slingfin.com. Header image is compliments ofRainy Pass Repairs. Thanks!
Nylon
Nylon is by far the most common material used in tents. It was originally developed by DuPont in the 1930s and was used extensively for parachute production during WWII. It is the standard for the majority of outdoor products, from tents to apparel. This is largely due to its good strength to weight ratio, good abrasion resistance, and relatively low price.
Strength
Nylon has a much better strength-to-weight ratio than polyester, which is the main reason it is usually the fabric of choice for tents. Much of nylon’s strength comes from its inherent stretchiness, which can be a blessing and a curse. Because nylon stretches, it distributes stress over a larger area than less stretchy (we say more “stable”) fabric would. For example, if a guy point were attached in the center of a fabric panel on a tent’s fly on a 1” x 1” reinforcement, the surrounding fabric would stretch, and the stress of the guy line being pulled would be distributed over a much larger area than just the 1” x 1” reinforcement. If, however, the fabric does not stretch, all the force is concentrated at the reinforcement, leading to much higher stress on the fabric and a higher likelihood of tearing. Another benefit of fabric stretch when designing a tent is that it works better for shaped 3-dimensional panels.
Nylon’s stretchiness has a downside, however. A fly made of less stretchy fabric (e.g. polyester) can achieve a more aesthetically pleasing pitch, as much of the wrinkliness in the fly is caused by nylon stretching along its bias (diagonal with respect to the way the fabric was woven). Fabric that does not stretch as much reduces that issue.
Abrasion Resistance
Nylon is the most abrasion resistant of these fabrics. This is generally more of a consideration in apparel design, but parts of your tent will likely be exposed to abrasion (think floor, pole ends and clips). These can become failure points if the fabric abraids enough to weaken it.
UV Damage
Nylon is susceptible to degradation from UV exposure. This is primarily an issue for mountaineers who use their gear at high elevations where the UV index is very high. It also creates long-term durability issues for core users who use their tents several weeks out of the year for many years. Polyester and DCF do not degrade as much as nylon when exposed to sunlight for extended periods of time. However, any lightweight fabric will be more susceptible to UV damage than a heavier equivalent. Thicker diameter fibers mean much of the inner part of the fiber is protected from the sun. Even as the outside degrades, the inside will remain intact longer. UV radiation penetrates farther (as a percentage of total fiber thickness) into smaller diameter fibers. There are fabric coatings designed to lessen the effects of UV radiation on nylon (Our ET70 fabric, for example), but for users who treat and store their tent with care, UV damage will still probably be the limiting factor in a tent’s lifespan.
Water Absorption
Nylon absorbs water, which poses several problems. In addition to weighing more, wet nylon will expand. In the field, this means that a nylon fly will sag when exposed to moisture (from precipitation or high humidity) which translates to late-night trips outside to tension the fly to keep it from sagging onto the tent body. Again, coatings can help mitigate this issue (look for both side silicone coated fabrics instead of PU; more on this in future articles). While polyester also absorbs some water, it absorbs much less than nylon, and will maintain tension better when wet.
Polyester
Once relegated to the realm of price point and car-camping tents due to scarcity of high quality formulations, polyester has enjoyed a bit of a renaissance recently, as advancements in high-end polyesters, especially on the lightweight end of the spectrum, have significantly improved its once abysmal strength to weight ratio. While we still primarily use nylon in our tents, poly has several advantages that make it an appealing option for some applications, and its use is certainly becoming more widespread.
Tear Strength
Polyester generally has a lower tear strength when compared to similar weight nylons. To achieve comparable strength to nylon, designers often elect to use heavier, thicker polyester. However, newer polyester textiles have much improved strength over their older counterparts, and they’re popping up more and more on lightweight tents. Polyester has become especially popular in lightweight tarp and mid-style shelters, where the fabric is not under as much stress as it is in traditional tents. We’ll be testing some lightweight polys in our lab to determine just how big of a difference to expect between nylons and polyesters of the same weight.
Stability
Polyester has much less stretch than nylon, and flies made of polyester pitch well due to its stability. This is especially true in humid or wet conditions, where nylon’s absorption can lead to a saggy flysheet and difficulty pitching the tent. In our anecdotal experience, we haven’t found this positive characteristic to outweigh lower strength to weight ratio of lightweight polys, but again, we’ll hopefully have some real data soon to verify this one way or the other.
UV Resistance
It is generally believed that polyester is more UV-resistant than nylon. There haven’t been many studies done directly comparing the lightweight polyester and nylon textiles used in tents, so although studies indicate that polyester in general is indeed significantly more UV-resistant than nylon, we’re waiting until we conduct an apples-to-apples comparison of lightweight coated textiles like those used in tents.
Across all fabrics, however, including polyester, fabric thickness and color play major roles in determining UV resistance. Especially for lightweight fabrics, the color and denier of the fabric may make more difference in the fabric’s long-term UV resistance than the composition of the fibers.
Poly is a popular fabric for sails and other applications where low stretch is a priority, and while its resistance to UV damage and low water absorption make it a theoretically desirable material for use in shelters, it hasn’t been until recently that lightweight polyester can achieve adequate strength at the low weights consumers demand in most high-performance tents. Polyester shows significant promise for tents, but we’ll continue to predominantly use nylon until we’ve done enough testing to be confident that the advantages of poly outweigh its drawbacks.
Dyneema Composite Fabric
Dyneema Composite Fabric, or DCF, is the new kid on the block when it comes to tent fabrics. It used to be called Cuben Fiber, but the name was changed to Dyneema Composite Fabric when Dyneema acquired Cubic Tech, the company that makes the material. Many people still refer to the material as Cuben Fiber.
First, because I know there are some sticklers out there who will call me out on this, I am aware that some folks would argue that DCF is not technically a fabric. If you’d like to mince words, yes, it’s really a composite comprised of a nonwoven ultra high molecular weight polyethylene matrix laminated between two layers of polyethylene terephthalate film. But since it’s used interchangeably with woven textiles in outdoor gear (and “fabric” is quicker to type), we’ll group it in with the fabrics here, and I invite all those who think I’m a Russian troll sowing discord in the outdoor community by mixing materials definitions to get in touch with me at thebeta@slingfin.com. DCF is made by sandwiching Dyneema fibers between two layers of film (similar to Mylar). The Dyneema fibers are not woven, and are usually laid out at 90˚ angles.
Strength
Dyneema (a brand name for ultra high molecular weight polyethylene, or UHMWPE) is incredibly strong for its weight. No other material currently used in tents comes close to the tear strength of DCF on a per weight basis. Thus, DCF fabrics can achieve the same strength as nylon at a much lower weight. Despite its strength, DCF has almost no stretch. Dyneema’s lack of stretch and high strength to weight ratio makes it a highly desirable material for sails and numerous industrial applications.
DCF’s strength has some limitations, however. Seam failure from needle hole expansion is a common issue with films and nonwovens, so seams have to be bonded and/or hot taped. Tape adhesives are often a weak point and can degrade before the rest of the shelter wears out. It helps to put the tape on the inside (which is standard practice for most manufacturers) to lessen its exposure to UV radiation.
Waterproofing
DCF is inherently waterproof and doesn’t absorb any water, whereas both nylon and polyester wovens rely on a chemical coating (usually PU, silicone, or PE; we’ll talk about them in future articles) to make it waterproof. Coatings add weight and are prone to failure, so eliminating them means a lighter finished fabric with better longevity.
UV Resistance
DCF has much better UV resistance than nylon. It won’t degrade and weaken under repeated exposure to sun the way nylon does.
Abrasion Resistance (or lack thereof)
From a functionality standpoint, DCF’s Achilles heel is abrasion resistance. Since the outer layer of DCF is actually Mylar (the Dyneema fibers are on the inside, remember?), it is extremely vulnerable to abrasion (if you’ve ever tried to use an emergency blanket more than once you’ve experienced this firsthand). Ultralight enthusiasts may have noticed that DCF stuff sacks don’t last nearly as long as nylon ones, and the same is true for DCF backpacks. For most shelter applications, especially the simple tarps favored by the thru-hiking community, this isn’t much of an issue. Where this potentially becomes a problem is when companies use DCF in traditional tent construction. Tent pole clips and pole hubs can be more than abrasive enough to wear through a DCF fly when the tent is being buffeted by wind, especially in dusty areas where grit amplifies the effects of abrasion. My expectation is that unless the abrasion resistance issues can be addressed, DCF will only get substituted for nylon in currently available double-wall tent designs primarily as an UL statement piece, purchased by those with lots of money and not enough time to do their homework. Considering that switching out nylon for DCF in pre-existing double wall tent designs can push the price close to $1000, it's difficult to imagine true double-wall semi- or fully-freestanding DCF tents being a viable option for ultralight hikers, when purpose-built DCF shelters from cottage brands weigh less, provide much more livable space, and are stronger, all at about half the price.
Price
DCF is a fancy new space-age material with a price tag to match. At wholesale, $5/yard is considered expensive for high-quality nylon. For comparison, DCF rarely costs under $20-$30/yard. This is why DCF is generally found in less labor-intensive products (packs, tarps) from direct-to-consumer companies that don’t have to build wholesale margins into their pricing. Until someone develops a product that can compete with DCF’s strength to weight ratio, it’s unlikely that the price will fall. It’s prohibitively expensive for many consumers, especially considering that the weight savings are diminishing as lightweight nylons improve.
DCF is not a panacea for durability concerns in lightweight shelters. It does, however, mark a pretty significant leap forward in shelter materials. While its applications are fairly niche due to its astronomical price point and poor abrasion resistance, it does certain things better than any other material out there. Expect to see more of it in the future as ultralight backpacking moves into the mainstream.
There is no magic in shelter design. Every choice involves making sacrifices in one or more areas, and there are no perfect solutions. Nylon’s well-balanced characteristics make it a good choice in most outdoor applications, but, like every material, it has its share of shortcomings. Improvements in fabric weaving and coating technology mean we can expect to continue seeing incremental improvements in materials, but nothing radically different is on the horizon (to the best of my knowledge), so this is what we have to work with for the time being.
Hopefully, this has provided you with a little insight into tent fabrics, and will improve your understanding of the shelter options available to you when it comes time to pick your next adventure home.
The main environmental factor that degrades tents being used at high altitude is exposure to UV radiation. Nylon, while having good tensile strength and abrasion resistance, is susceptible to being weakened by prolonged exposure to the UV radiation found in sunlight, which is especially strong at high altitudes. For this reason, most tents used at Everest base camp last only 1-2 seasons. Our ET70 and LS07 fabrics feature extremely UV-resistant Titanium Dioxide coatings that extend the fabric's lifespan by 300-400%. Think of it as tent sunscreen. ET70 and LS07 fabrics are found on our LFD and BFD tents.
Historically, Titanium Dioxide coatings have been added to fabrics using transfer paper, which also must be discarded after each use. SlingFin worked with Dimension Polyant to find a more environmentally friendly method of coating the fabric.
Now, Dimension Polyant uses recyclable plastic films for applying the transfer coatings. The plastic film produces a shiny finish on the coating but that is a small price to pay as compared to wasting thousands of yards of transfer paper. The coatings are applied here in the USA at the Dimension Polyant mill in Putnam, Connecticut. All excess solvents are reused and the factory has a state of the art air filtration system so no harmful vapors are released into the atmosphere. ET70 is one of the most environmentally friendly UV resistant fabrics ever made for the weight.
]]>
https://www.slingfin.com/blogs/the-beta/the-honey-badger-story-and-tips2019-02-02T10:14:00-08:002024-02-06T11:03:18-08:00The Honey Badger Story and TipsSlingFin AdminMore]]>
Al Tabor - Monday, October 15, 2018
It's all about solving design problems.
That's where this story begins...but then the solution went on a walkabout.
>> see end of article for links to hacks and usage tips <<
Decluttering Nepal
The Honey Badger story begins in the early days of SlingFin when lead designer Martin Zemitis needed an environmentally friendly way to ship his tents to Nepal.
The problem:a tent used on Everest is generally shipped to Katmandu then sent on a trek of its own that often includes transport by yak and significant abrasion by rock and ice before arriving at Base Camp. Martin wanted something tough, light, and 'sustainable' to act as a shipping container.
His solutionwas the Transfer Case, containers built from a scavenged durable material. His chosen construction technique used climbing rope or webbing and twist ties. The Transfer Case would be easy to construct in the office and repair in the field. After arriving the twist ties can be cut and the cases rolled up, tied with the webbing, and hauled out for reuse. The Cases had all the key features: tough, light, reusable.
But I don't have a yak
Outdoor gear innovation usually occurs at the intersection of a pain point and materials design. The first gear revolution in the 60's used aluminum allows aircraft parts and arrow shafts, for example, combined with other 'space age' materials to revolutionize backpacks and tents. Recently Cuben fiber from sailing was used to redefine ultralight backpacking.
Here we had a solved pain point and used an interesting material...very light and extremely tough with a construction technique that was adaptable across a wide variety of containers. Martin's sense was that there was potential here. Time to nose about and figure out: what does it want to be!?
He started playing with the case material. After a variety of different sorts of prototypes, various field tests, some sketching and a lot of musing we thought we had a bead on where this might go. Martin filed a patent which was accepted. We started iterating on pack design.
Pack design and drawings by Jonathan Buck
Suddenly a whole new thing
Any piece of back country gear is optimized around some set of trade-offs:weight vs durability, weight vs livability, waterproofness vs breathability...that sort of thing. As pack design moved from external to internal frames we gained stability during a scramble, some aspects of comfort, weight...and lost some things. One thing remained consistent. Both approaches used a backbone of sorts. Structural integrity was provided by the frame be it it a back panel and aluminum stays (or, earlier, the full external frame) and then a sack and a harness were attached.
The Honey Badger takes a radically different approach. If your old pack is a lizard with a backbone, then Honey Badger is a bug. The structural integrity is provided by an exoskeleton.This allows SlingFin to work with the trade-offs in a whole new way.
Some of the main trade-offs for backpacks are
support and stability
carrying capacity
weight
durability
water-proofness.
All of these could now be reconceptualized. Support, carrying capacity, and durability were all handled by a single exoskeleton rather than a combination of cordura, aluminum, webbing, etc. That new construction was a much lighter replacement for anything close to as tough and durable. (This fit well with our company objective of creating the toughest gear for the weight in any category we entered!) Furthermore, the pack could be smaller (and hence lighter) since capacity could be extended drilling holes and adding straps or literally bolting attachment points to the exoskeleton. Waterproofness was handled by a simple extremely light weight dry bag.
Design is never done. Ideas kept occurring to use. But It was time to try and bring a product to market.
Honey Badger V1
We chose the toughest shell material we could reasonably work with and produced a Propex Honey Badger Pack. We enlisted friends to help us shoot a video. We started prepping for aKickstartercampaign.
We had lots of fun trying to kill the pack in some dramatic fashion
.
We even managed to pop two of the twist ties on the airplane drop and shred the padded shoulder straps by dragging the pack 'wrong side down' behind a truck. We, also, noted that the construction allows the harness to be easily removed so we could have avoided killing the straps if the pack was being drug up a rock wall, and that carrying a couple of twist ties would let you put the pack back in shape after you kick it out of the plane or off the ledge.
We also discovered some hard truths about our marketing reach. Apparently great word of mouth about SlingFin among mountain guides doesn't translate into the ability to inform a broader public. Folks had trouble getting past the novel look and construction. And, oh, there might have been some delusional thinking in setting our goal.
Yet, we continued to make discoveries that confirmed our belief in the project.
As an example, a few weeks before launch SlingFinian Devo figured out an easy way toconvert the pack into a bike pannier.This has since been improved; you no longer have to remove the harness.
The campaign ended without funding...but our resolve to make the Honey Badger available was only strengthened.
Honey Badger V2
Part of the mountaineer pedigree is persistence. (Think: take four breaths and step and again and again. Repeat until summit.)
We continued to experiment with materials, fabrication, and features.We decided that vacuum forming was necessary to get a better working lid and side panels. This launched 6 months of research to get the optimum material formula and thickness for the vacuum formed parts. One thing we learned: vacuum forming is best done with specialized equipment. No need for you to try this at home, too. We've suffered on your behalf.
We also found the tools to trim twist ties without leaving rough spiky ends. We figured out how to optimize the 'glow in the dark' visibility feature and continued to learn about how to use the pack with bikes. We discovered you could not only extend the pack functionally but skin it up stylistically.
The accumulation of improvements, small and large, lead us to the point where we were ready for V2.
Thanks to Kickstarter and persistence, there are now dozens of packs in the hands of folks like you. Interesting things are happening with the pack that we never anticipated. Unlike most packs, the Honey Badger is a platform foryourtalents and experimentation.
This is an adventure in product development, possible only because of your participation.
Lighter and Stronger:Lighter weight promotes better technique and substantially enhances the outdoor experience. However, poles must also be safe. DAC tent poles are engineered to provide the increased strength and reliability required to safely cope with the most demanding conditions, while still remaining lightweight. The DAC tent pole range includes various types of tubes to suit different applications from heavy duty expedition to ultralight backpacking.
TH72M – A better material:Our poles are made from TH72M – an aluminum alloy that has set the new benchmark for strength to weight performance. Devolped by DAC, the world leader in ultra lightweight technology, TH72M is tough, durable, robust, and clearly the first choice in material for lightweight outdoor adventure equipment. In a sport where dramatic brittle failure (characteristic of carbon fiber) must be avoided, TH72M is the obvious choice for tent poles you can trust.
Eco-friendly:Our aluminum is anodized to maintain appearance and prevent corrosion. DAC received international recognition for developing the unique process of "green" anodizing TH72M. DAC's "eco friendly" process not only avoids the use of toxic chemicals like phosphoric and nitric acid, but it also helps to maintain the health of the DAC production team and conform with DAC's commitment to responsible corporate citizenship.
Expert Engineering:DAC has led the world in lightweight technology for over 27 years. The highest level of engineering skill and experience is supported by a sophisticated system of planning, control, and monitoring. DAC can respond to specific requirements, and meet the most demanding criteria and specifications.
Various accessories:DAC provides 'screwlock' tips for easy repair – short tip, long tip, mushroom head tip, ball tip, etc. Nice looking compact J stakes are also available. Additionally, DAC provides various kind of hubs and other accessories for tent designers, making it possible to develop many different types of tent pole architectures.
]]>
https://www.slingfin.com/blogs/the-beta/how-to-strengthen-your-tent-with-internal-guylines2018-12-11T16:57:00-08:002019-02-26T10:54:47-08:00How to strengthen your tent with internal guylines (video)SlingFin AdminMore]]>
Internal guylines are the best way to increase the strength of your tent for almost no weight penalty. In this video, we walk you through the internal guyline installation process for our 2Lite, 2Lite Trek, CrossBow, and WindSaber tents.
]]>
https://www.slingfin.com/blogs/the-beta/cobraclip2018-12-10T18:13:00-08:002019-03-11T12:40:02-07:00SlingFin Custom Tent Pole ClipsSlingFin AdminMore]]>
Reverse Gate CobraClip™
Built from Acetyl and stainless steel wire gates, the CobraClip™ is the ideal choice for cold environments. The reverse gate opening allows for better leveraging when locking the gate in the closed position and general ease of use. Having the gate open outward also allows for a larger opening and ease of use when clipping it around tent poles. Positive tension locking systems ensure that the gate will not open under high tension. We have designed the CobraClip™to be so easy to use that you can even use it with gloves on for those windy and snowy conditions!
The SlingFin RidgeClip™
Similar to the CobraClip™, the RidgeClip™ is also built from Acetyl and stainless steel wire gates, making it an ideal choice for colder environments. It is more of a general-purpose clip as it is smaller than the CobraClip™, and features an inward-opening gate like that of a traditional carabiner.


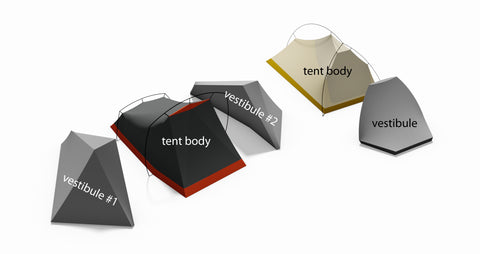
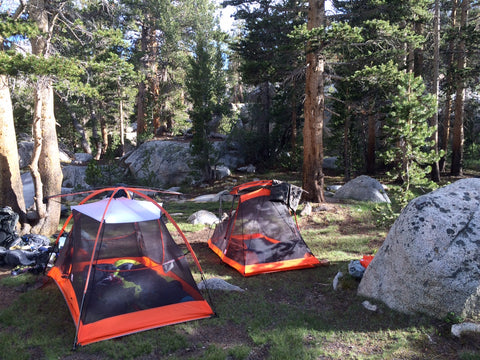


 Copyright SlingFin 2018 under Creative Commons License: okay to use with attribution. Please link to this article if quoting or reusing.